Weasis User Guide
How to view your own MRI scans
After your MRI scans, you may receive a CD/DVD image file with a .iso extension, containing your MRI scans. This guide will walk you through the steps to view them.
Uncompress the CD/DVD image file
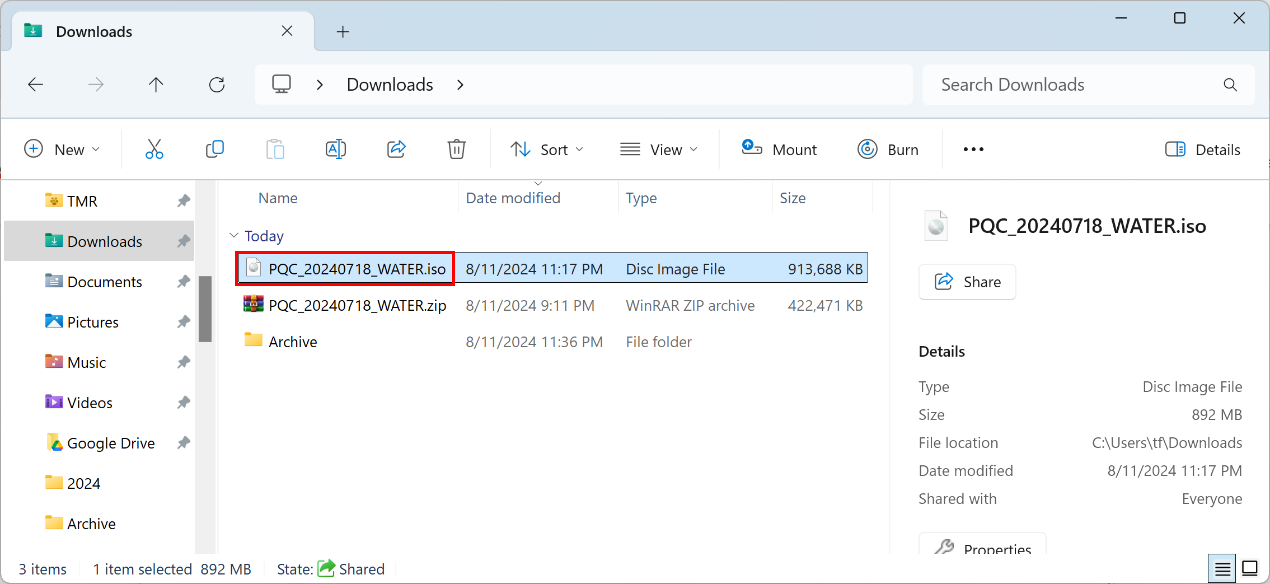
1. First, locate the downloaded .iso file
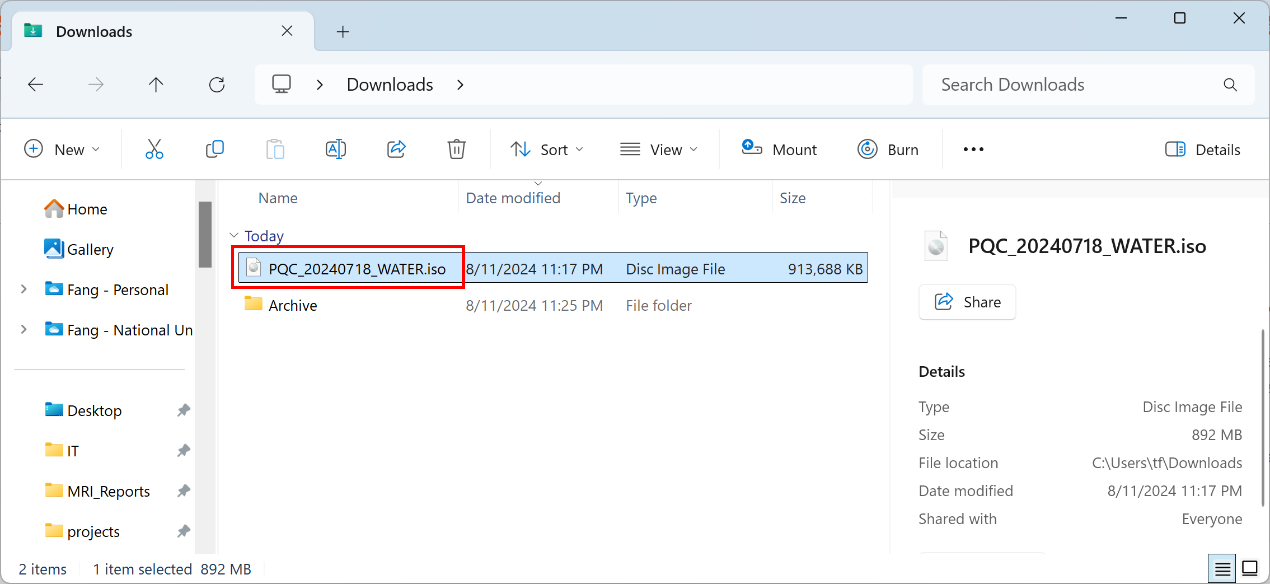
2. Then, right-click on the .iso file and uncompress it using a file archiver such as Bandzip or 7-zip

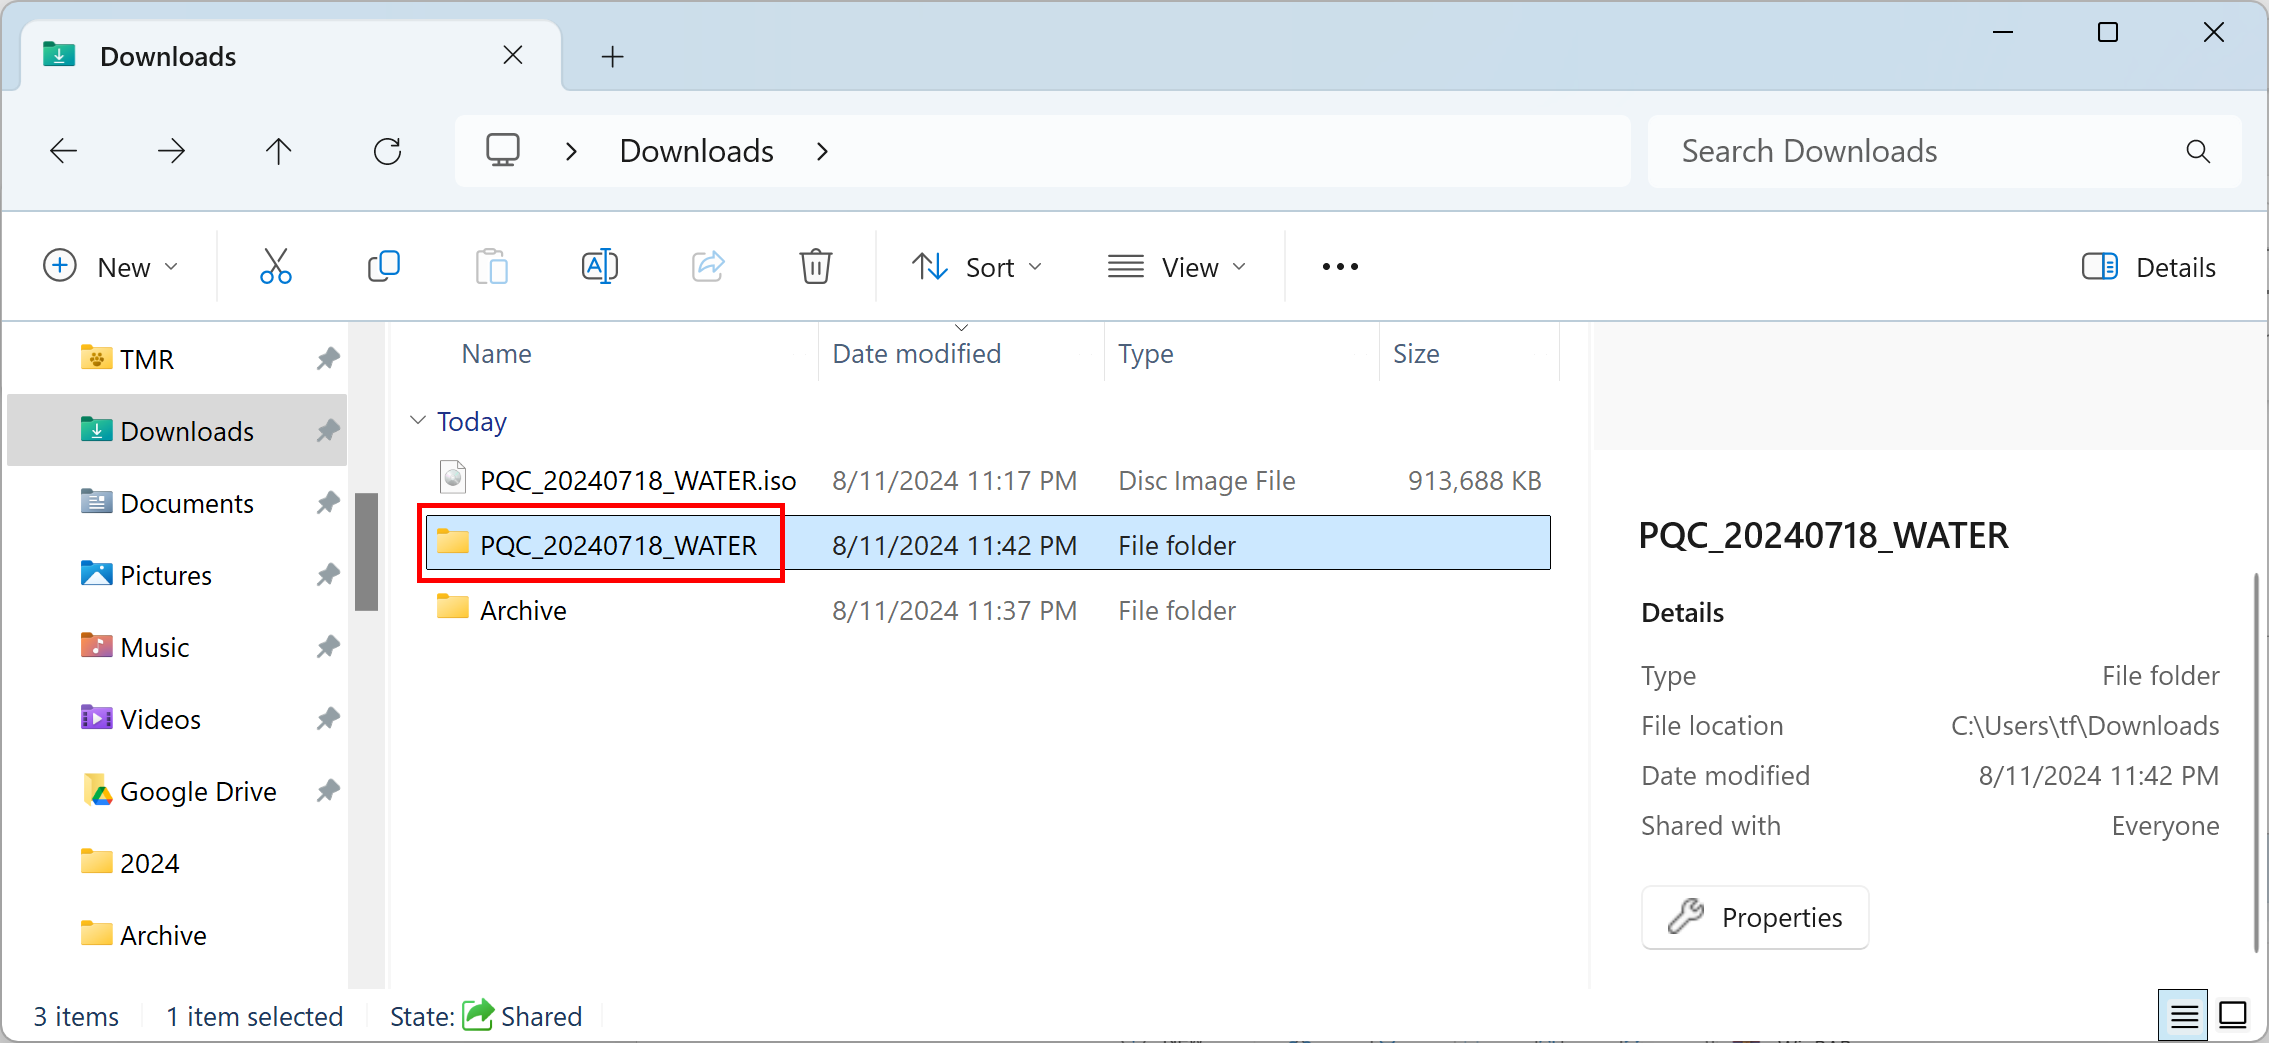
3. Open the uncompressed folder
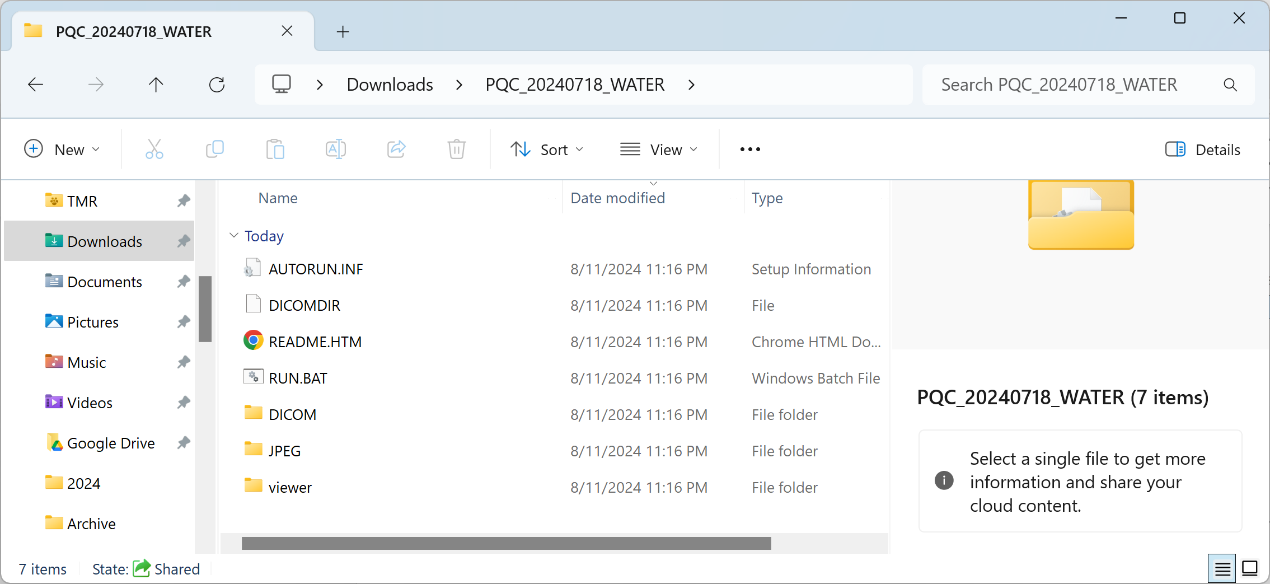
4. You will see files structured like this:
View the MRI scans
To view the MRI scans, you will have two options: the first one is to view the scans in JPEG image format, while the second one is to view the scans using a software called Weasis.
View MRI scans in JPEG
1. To view the MRI scans in JPEG image format, simply open the JPEG folder
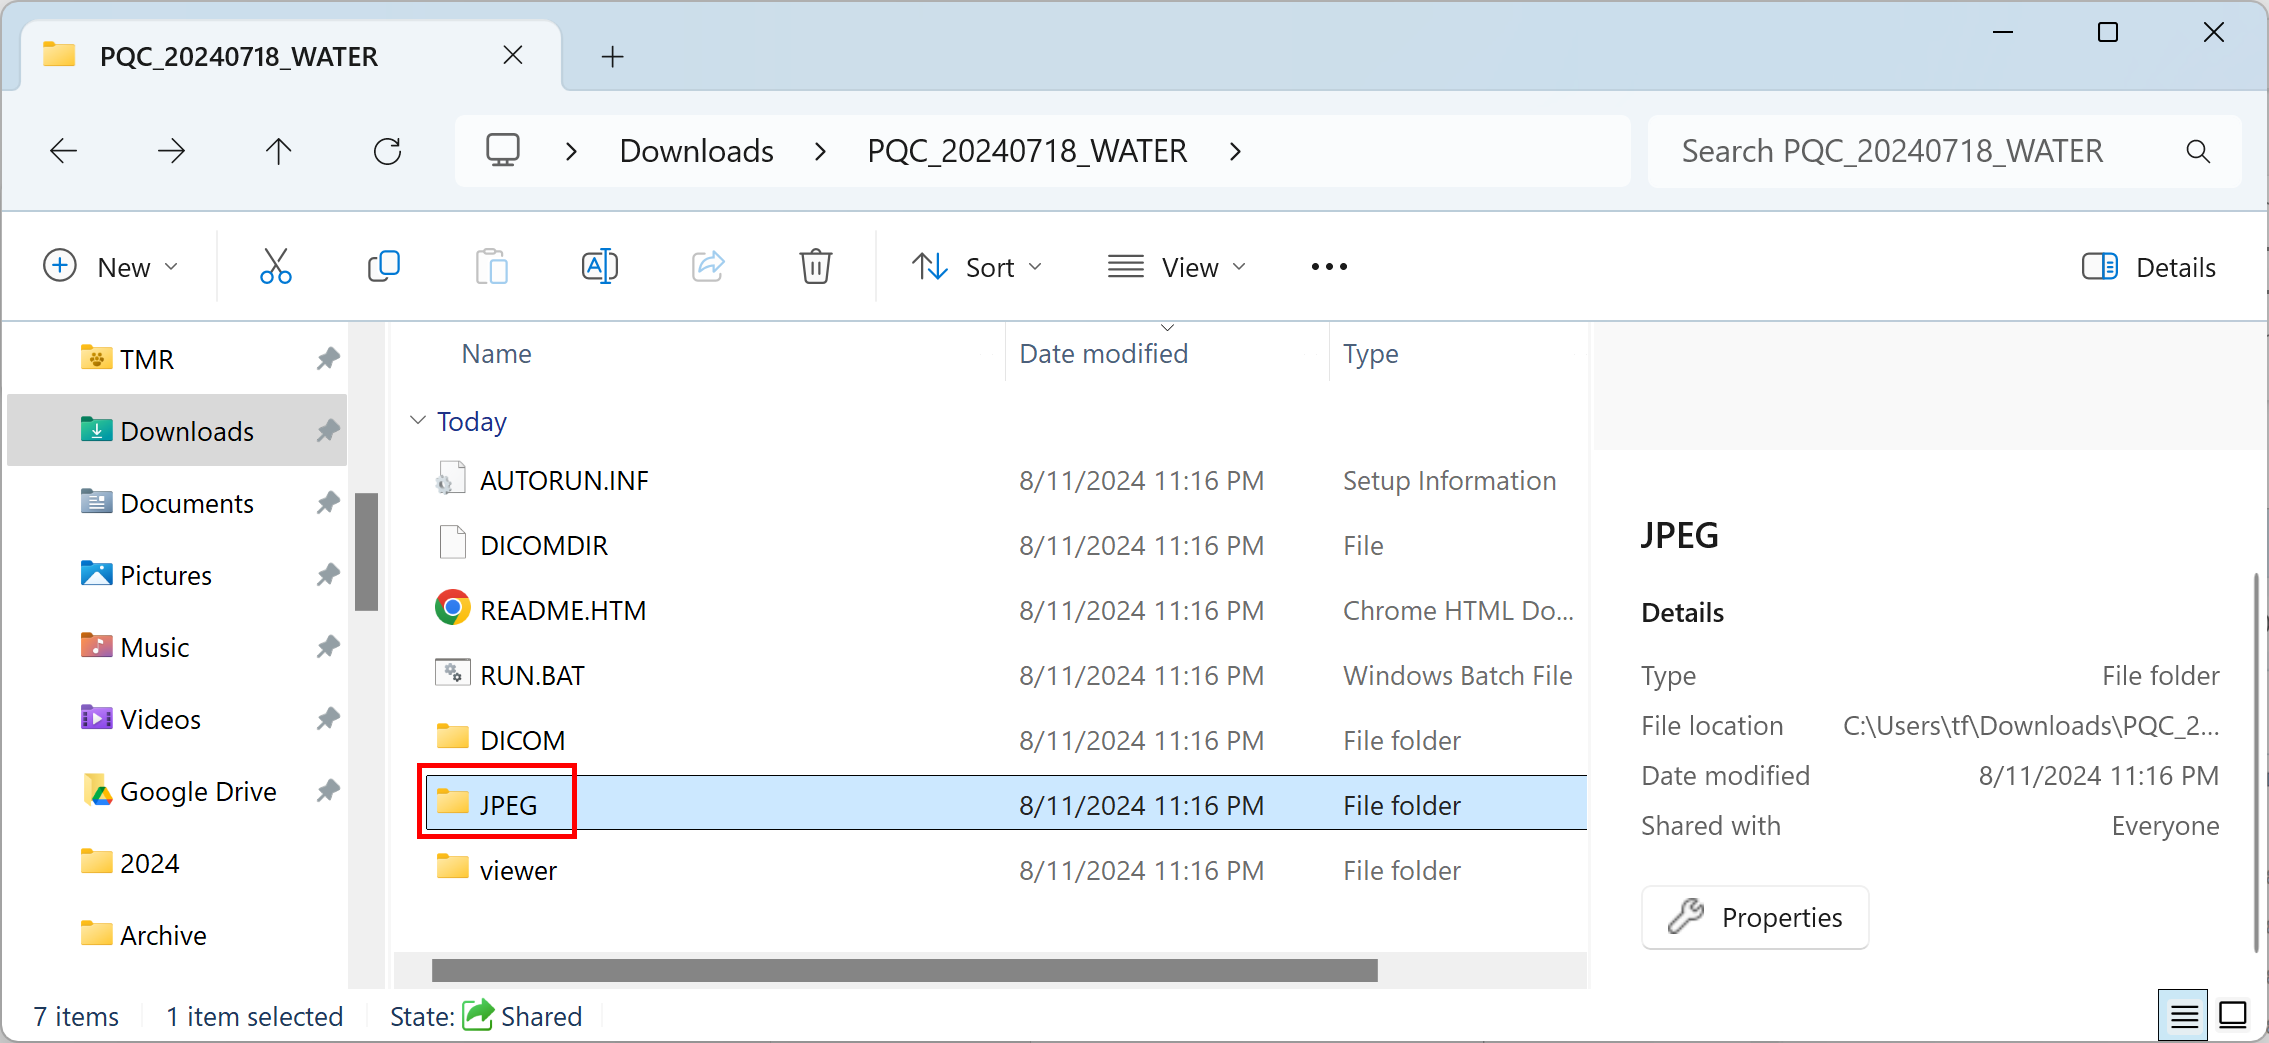
2. You will see various scans conducted
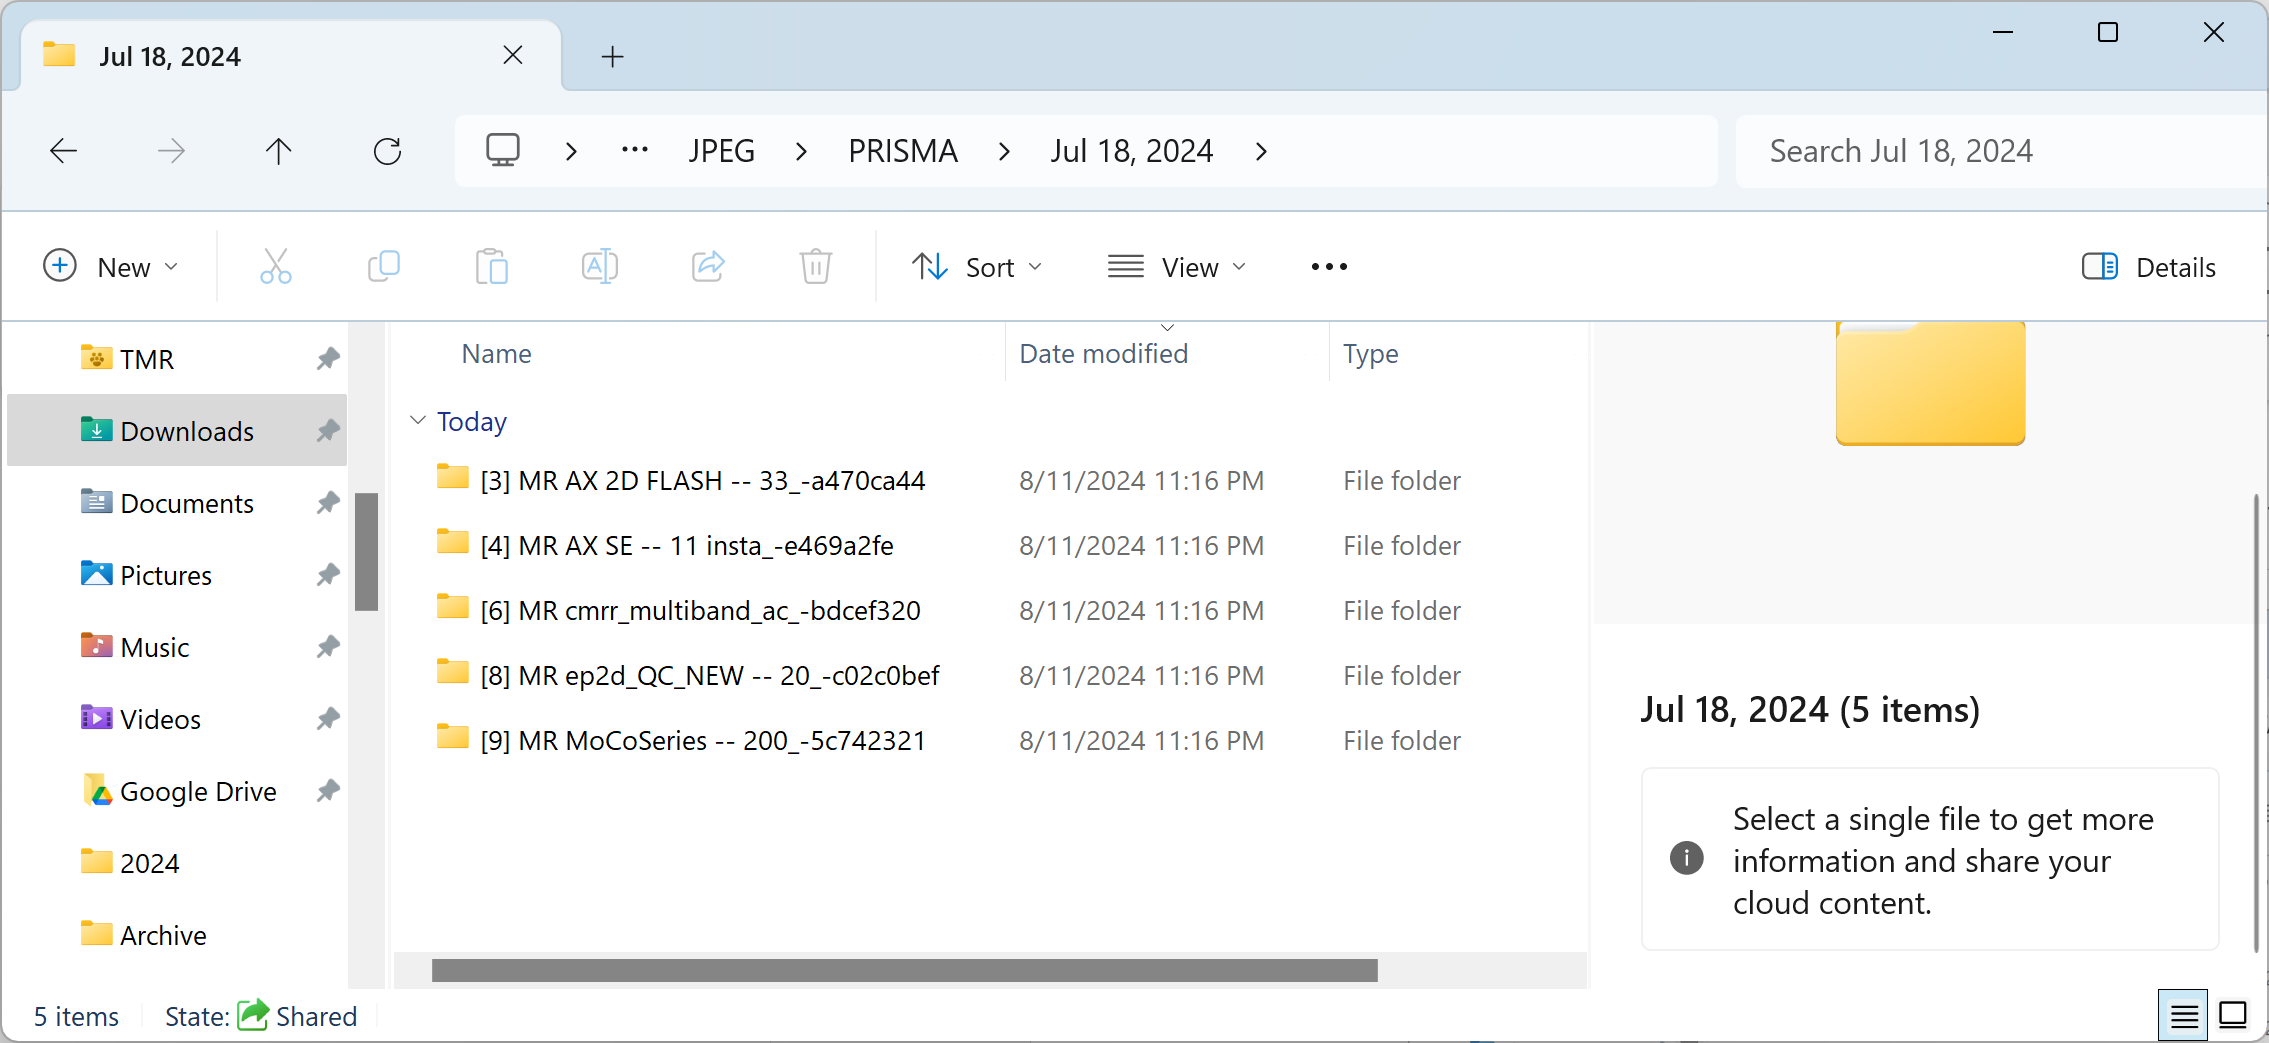
3. Click on one of them will reveal a series of JPEG images, which can be opened by double-clicking them
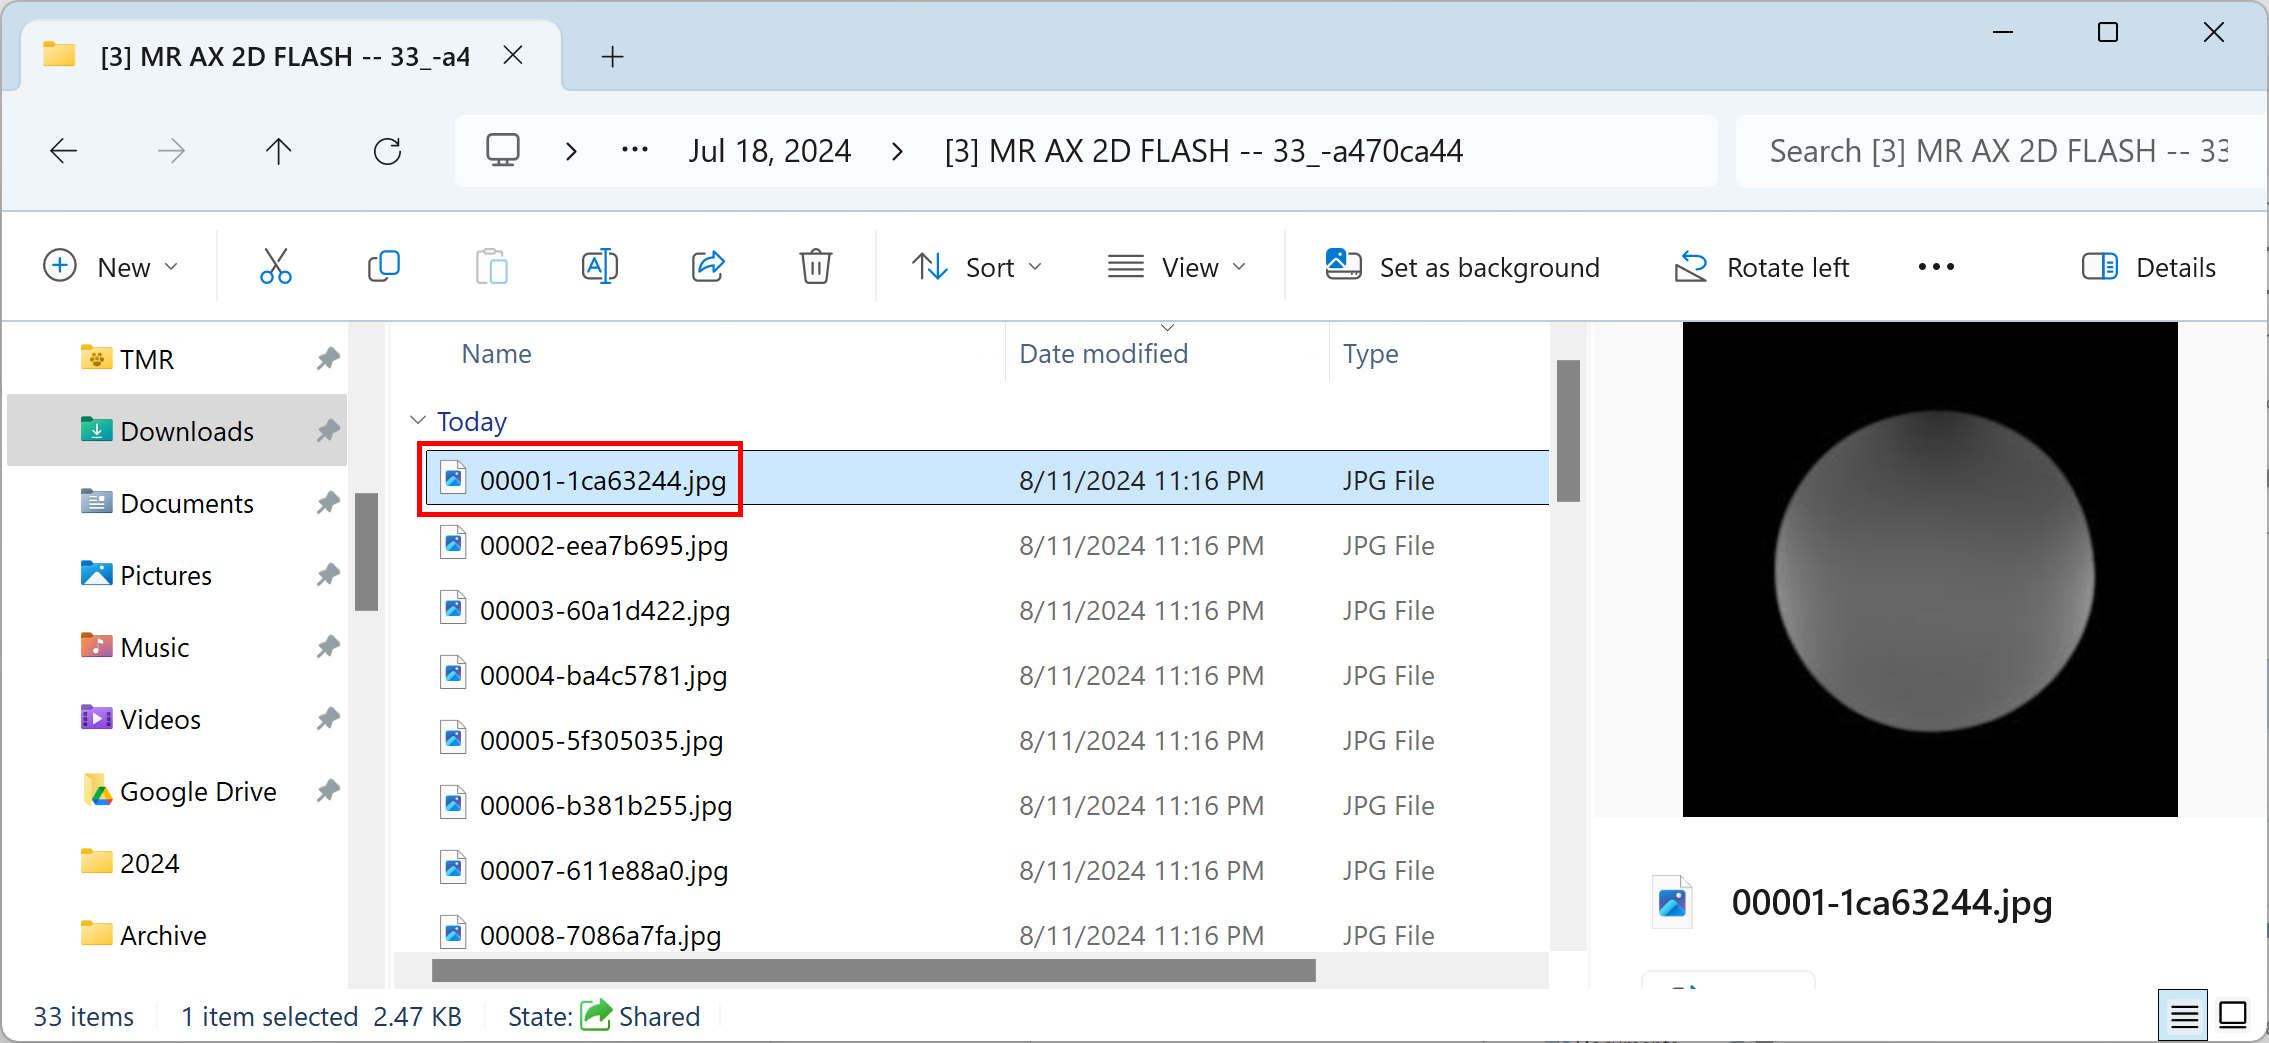
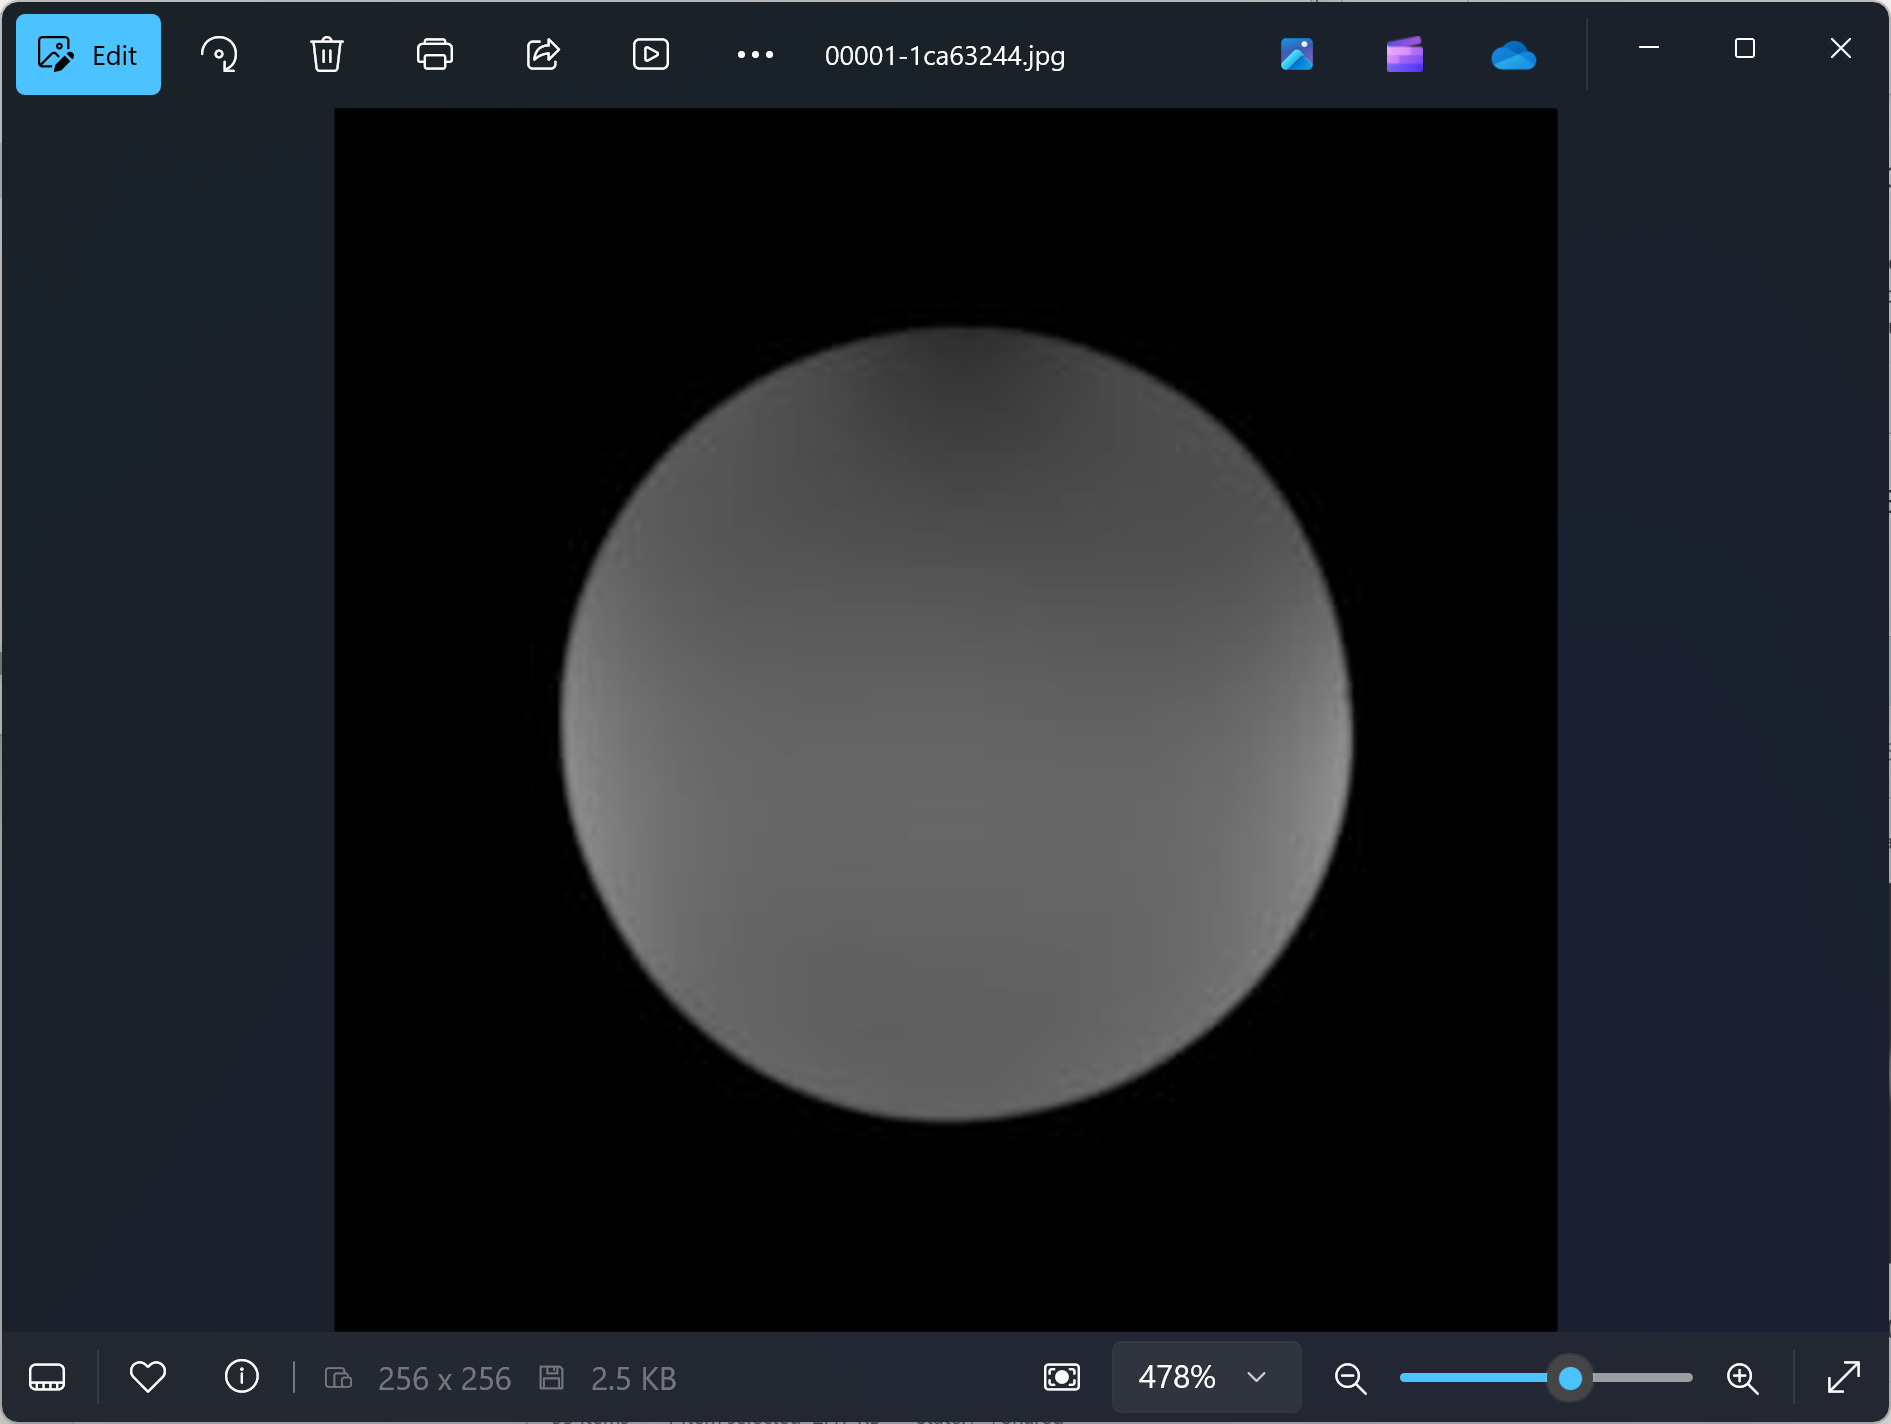
4. Then your default application for JPEG images will be opened
View MRI scans using the Weasis software
If you want to have more advanced features while viewing your MRI scans, you may open the scans using the Weasis software.
View MRI scans using the Weasis software (Windows)
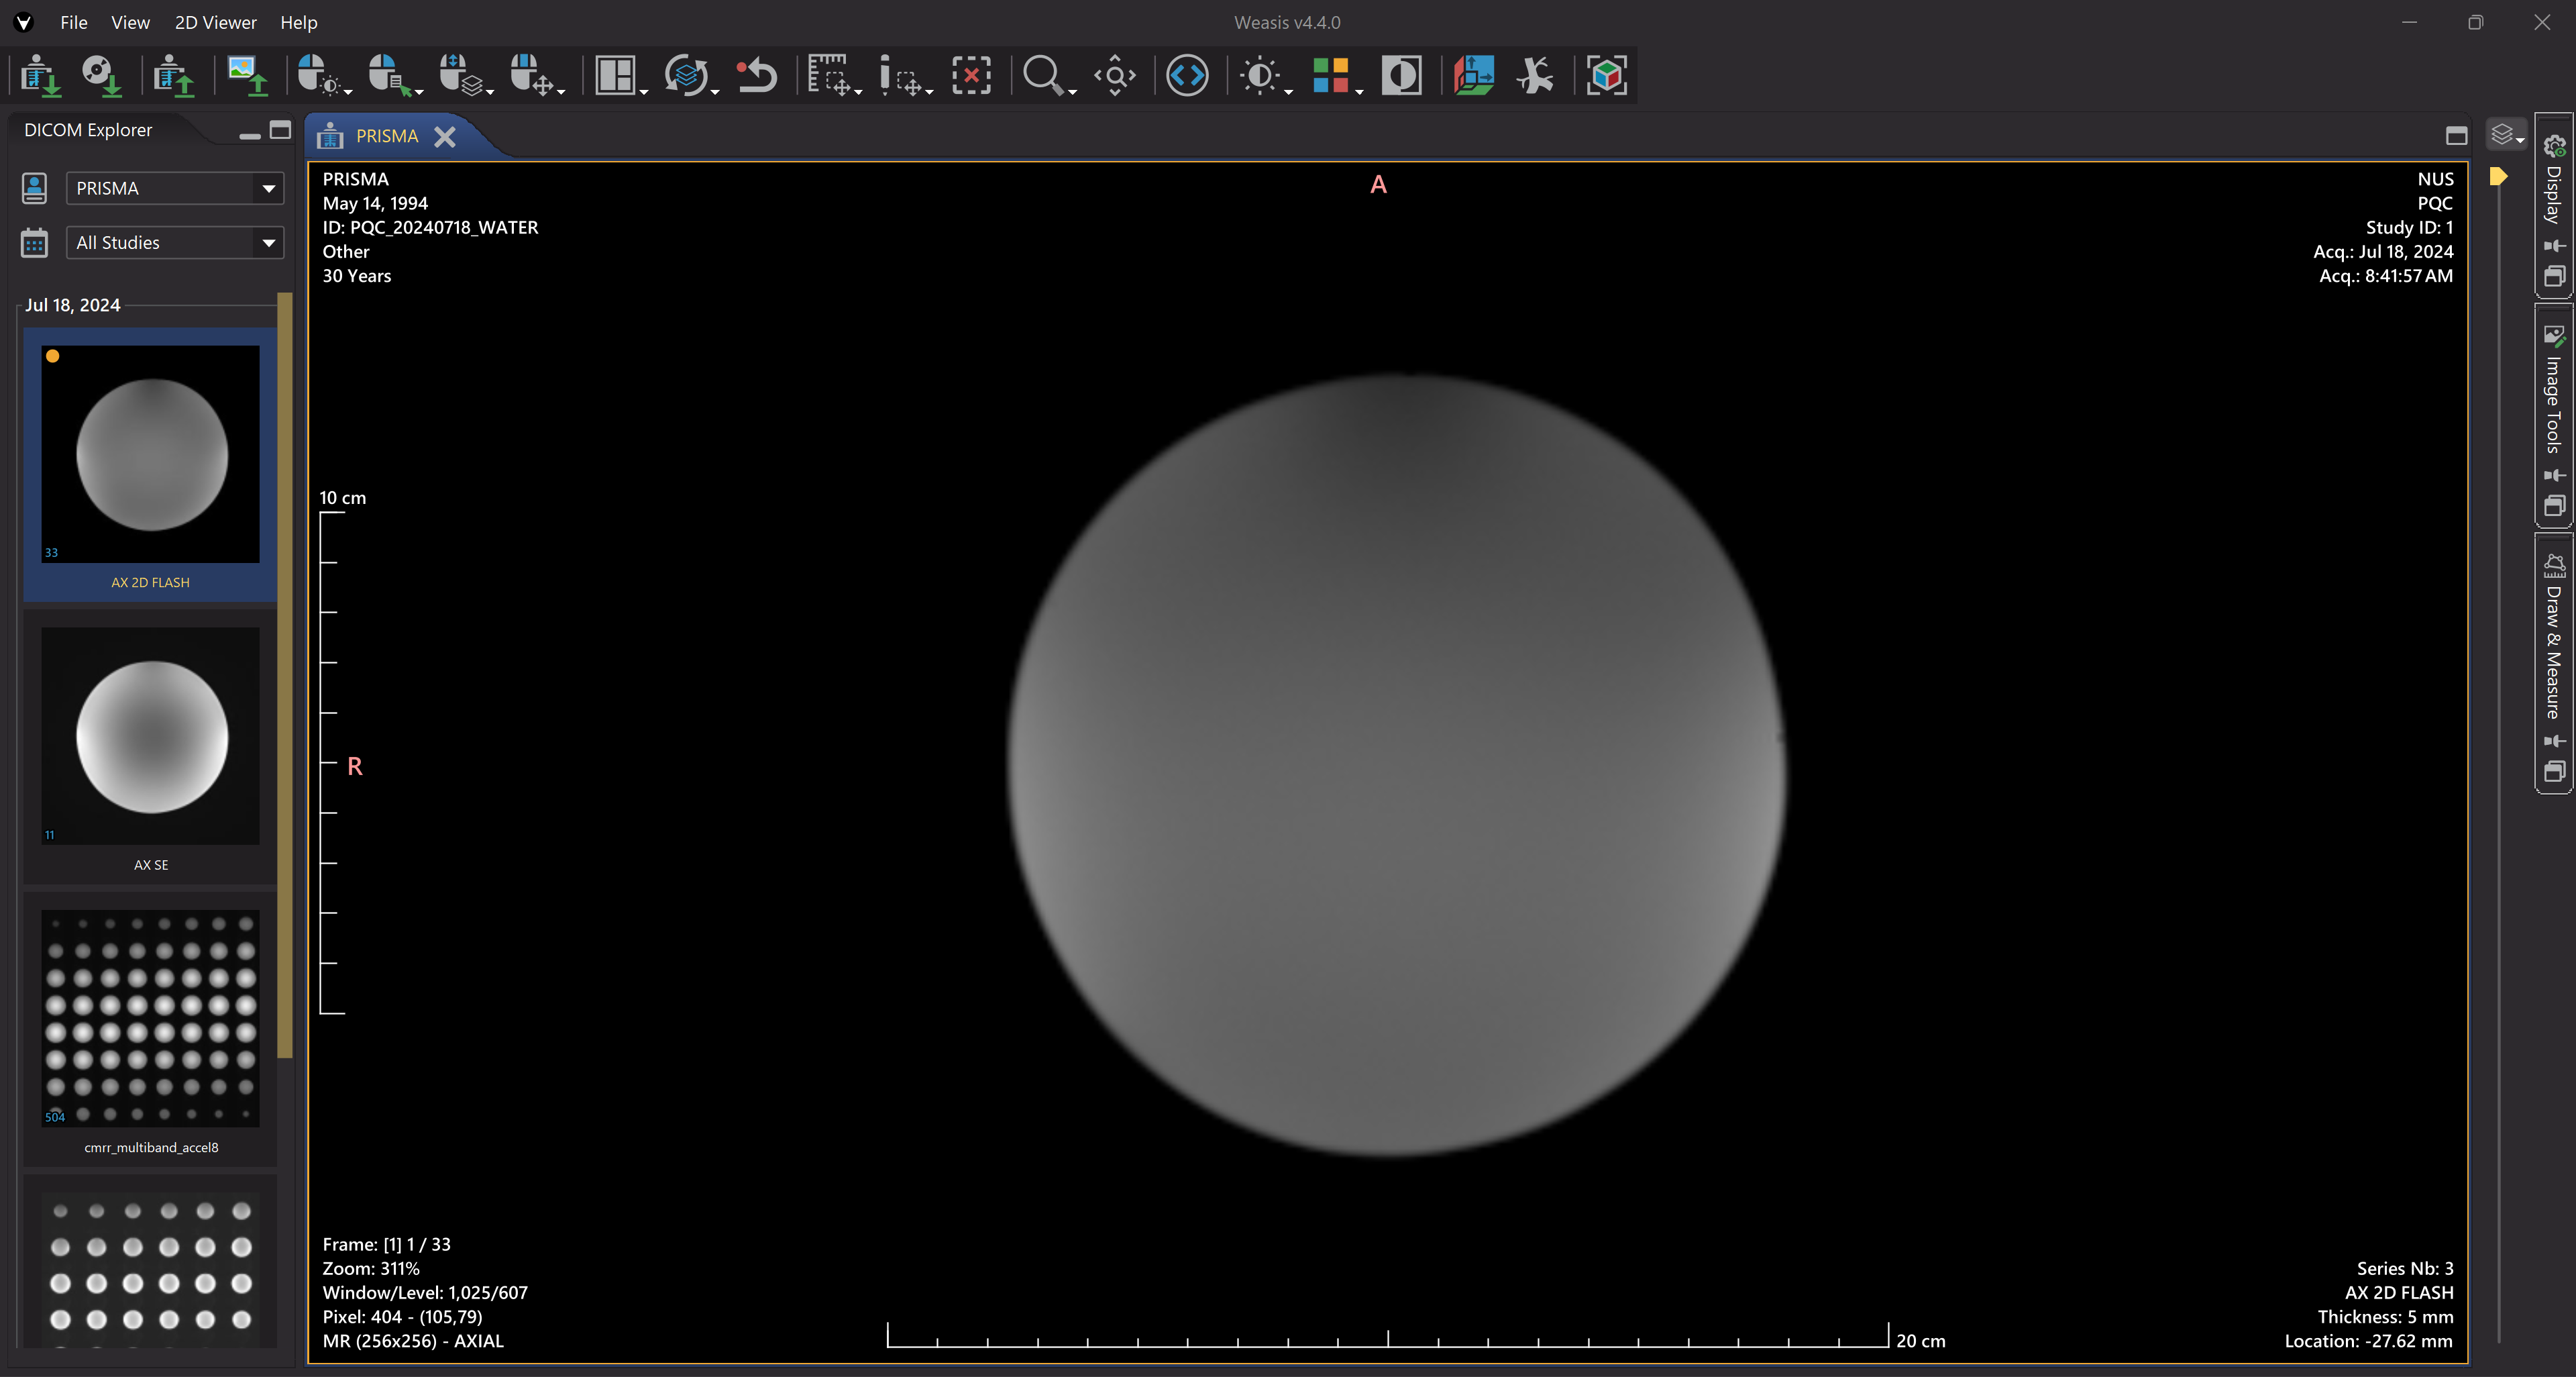
If you are on a Windows machine, you can simply double-click on the “RUN.BAT” file to open your scans with the Weasis viewer:
View MRI scans using the Weasis software (macOS)
If you are on a Mac machine, you will need to first visit weasis.org/en/getting-started/download-dicom-viewer/ and install the Weasis software.
Once the Weasis is installed, you can follow the steps below to view your MRI scans:
1. Firstly, open the Weasis DICOM viewer
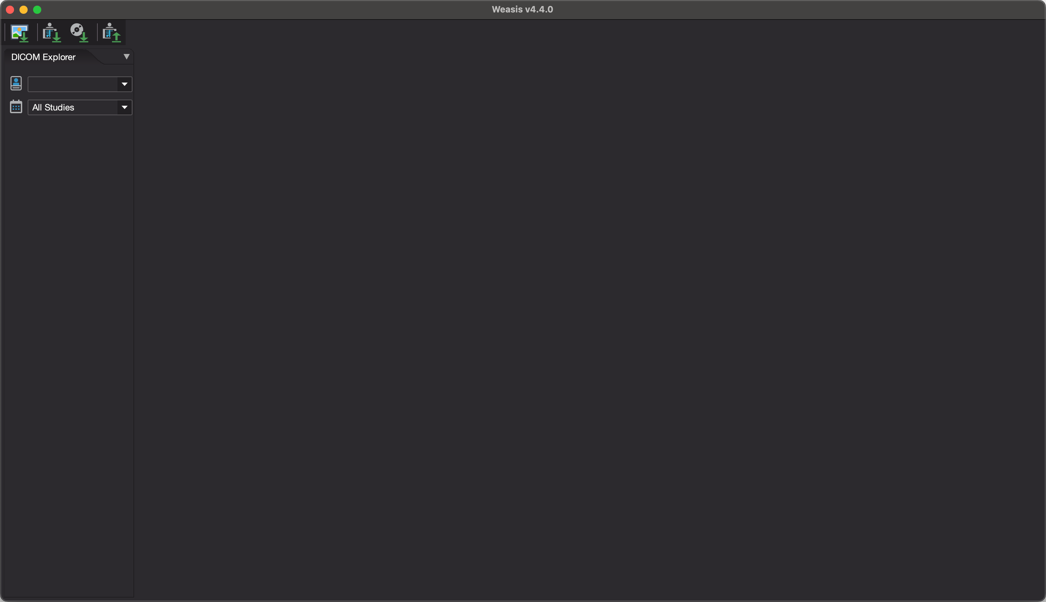
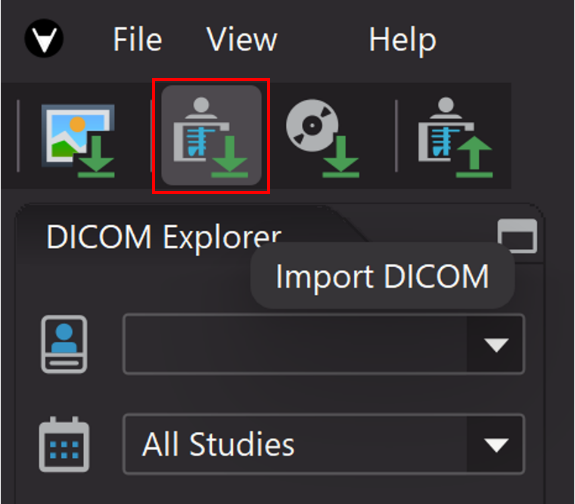
2. Then, click on the “Import DICOM” button at the top-left corner
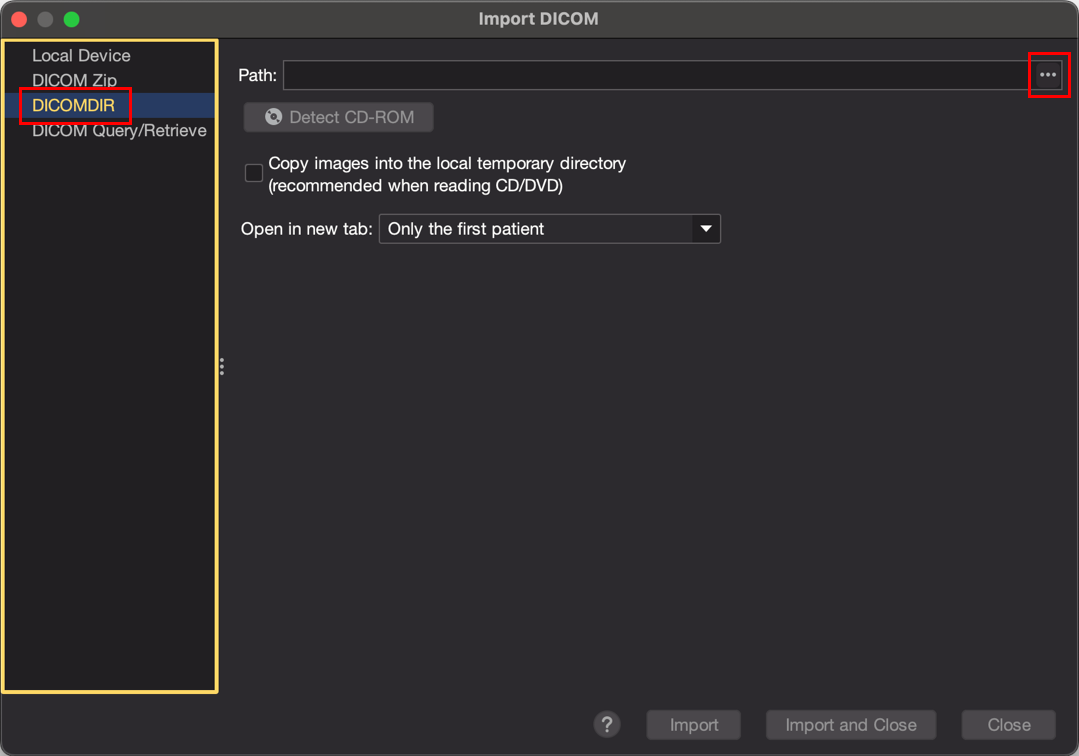
3. In the pop-up window, select the “DICOMDIR” option on the left, and then click on the three-dots button on the right
4. The file explorer will be opened, using which you can select and open the DICOMDIR file in the uncompressed folder
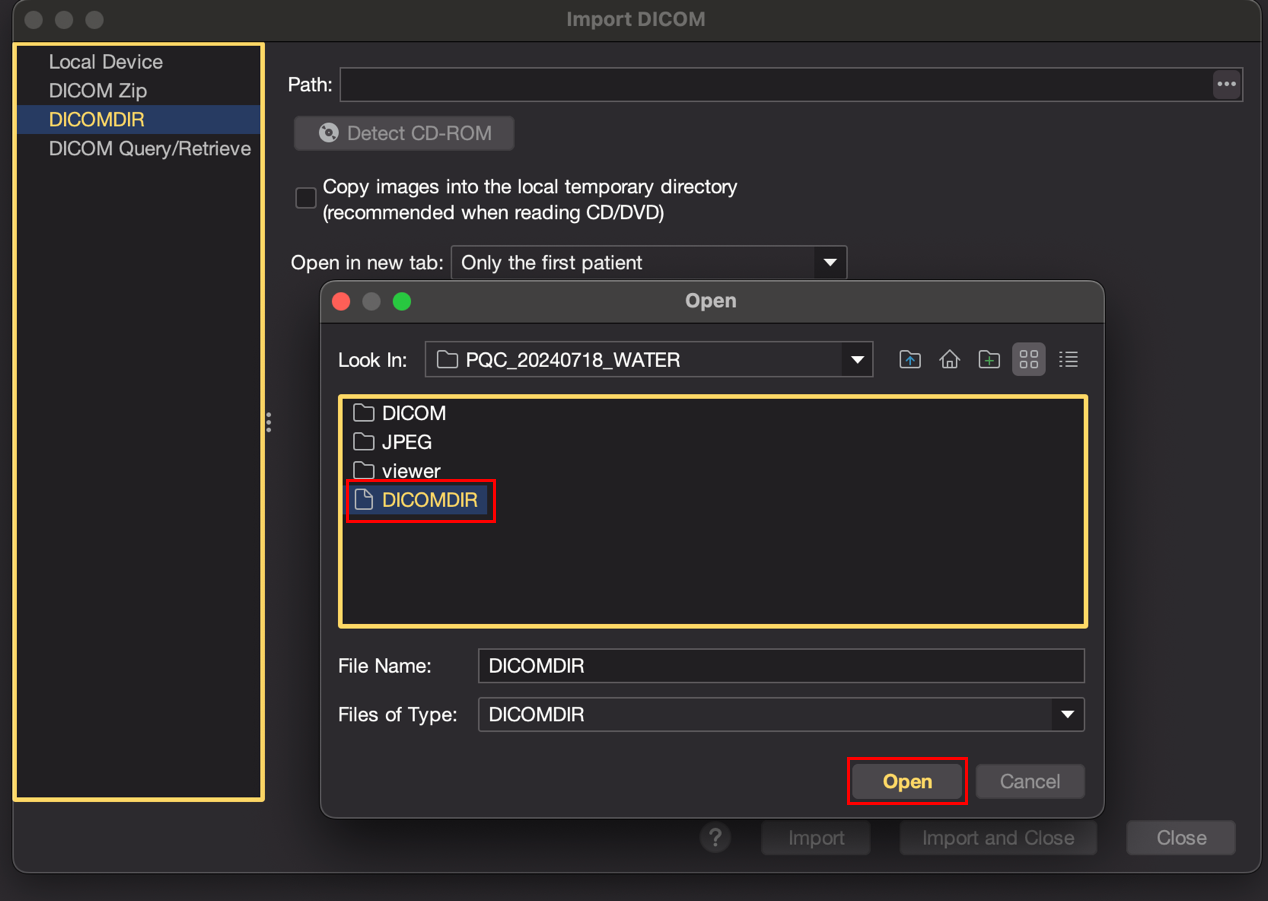
5. Then click on the “Import and Close” button
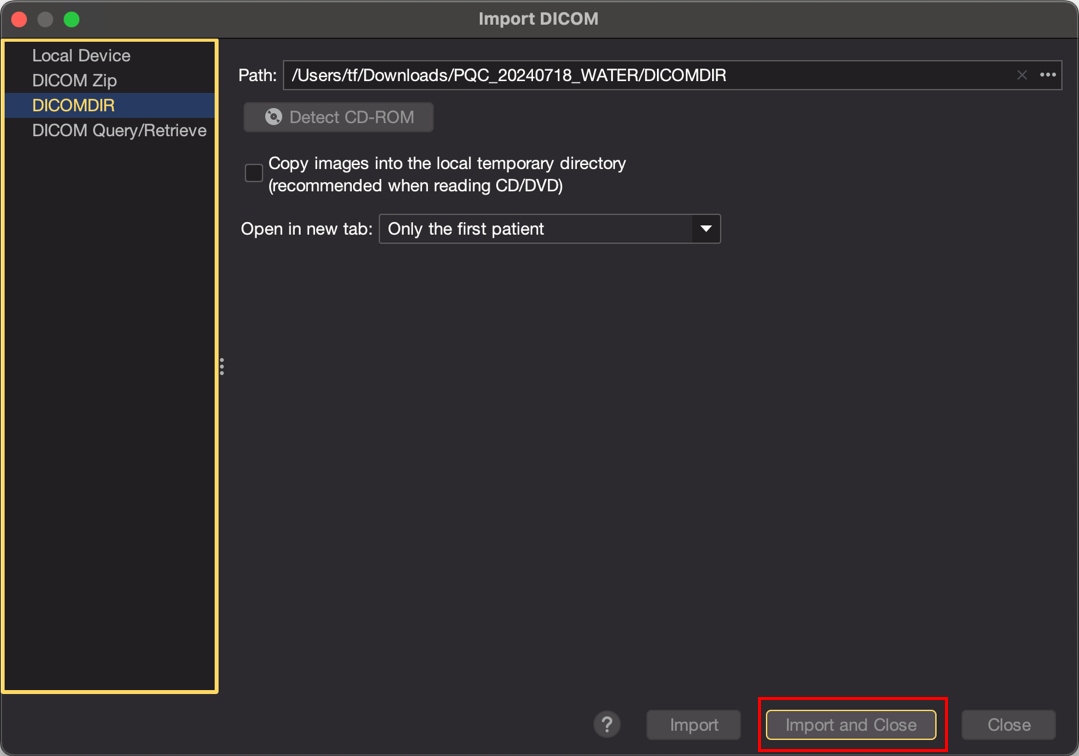
6. The MRI scans will be opened
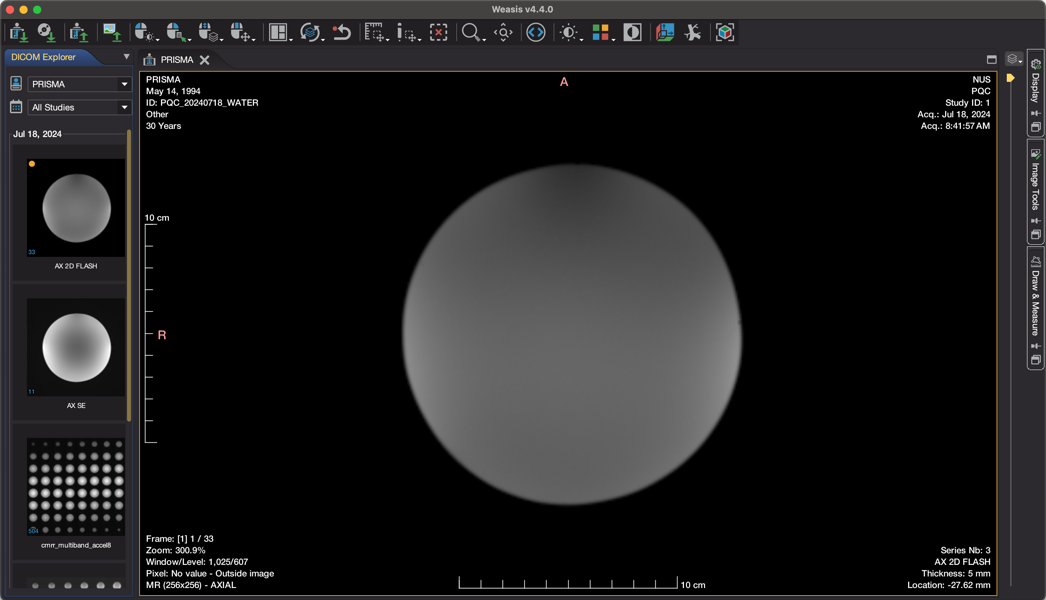
A basic introduction to the Weasis software
Once your scans are opened in the Weasis viewer, the first scan will be displayed by default.
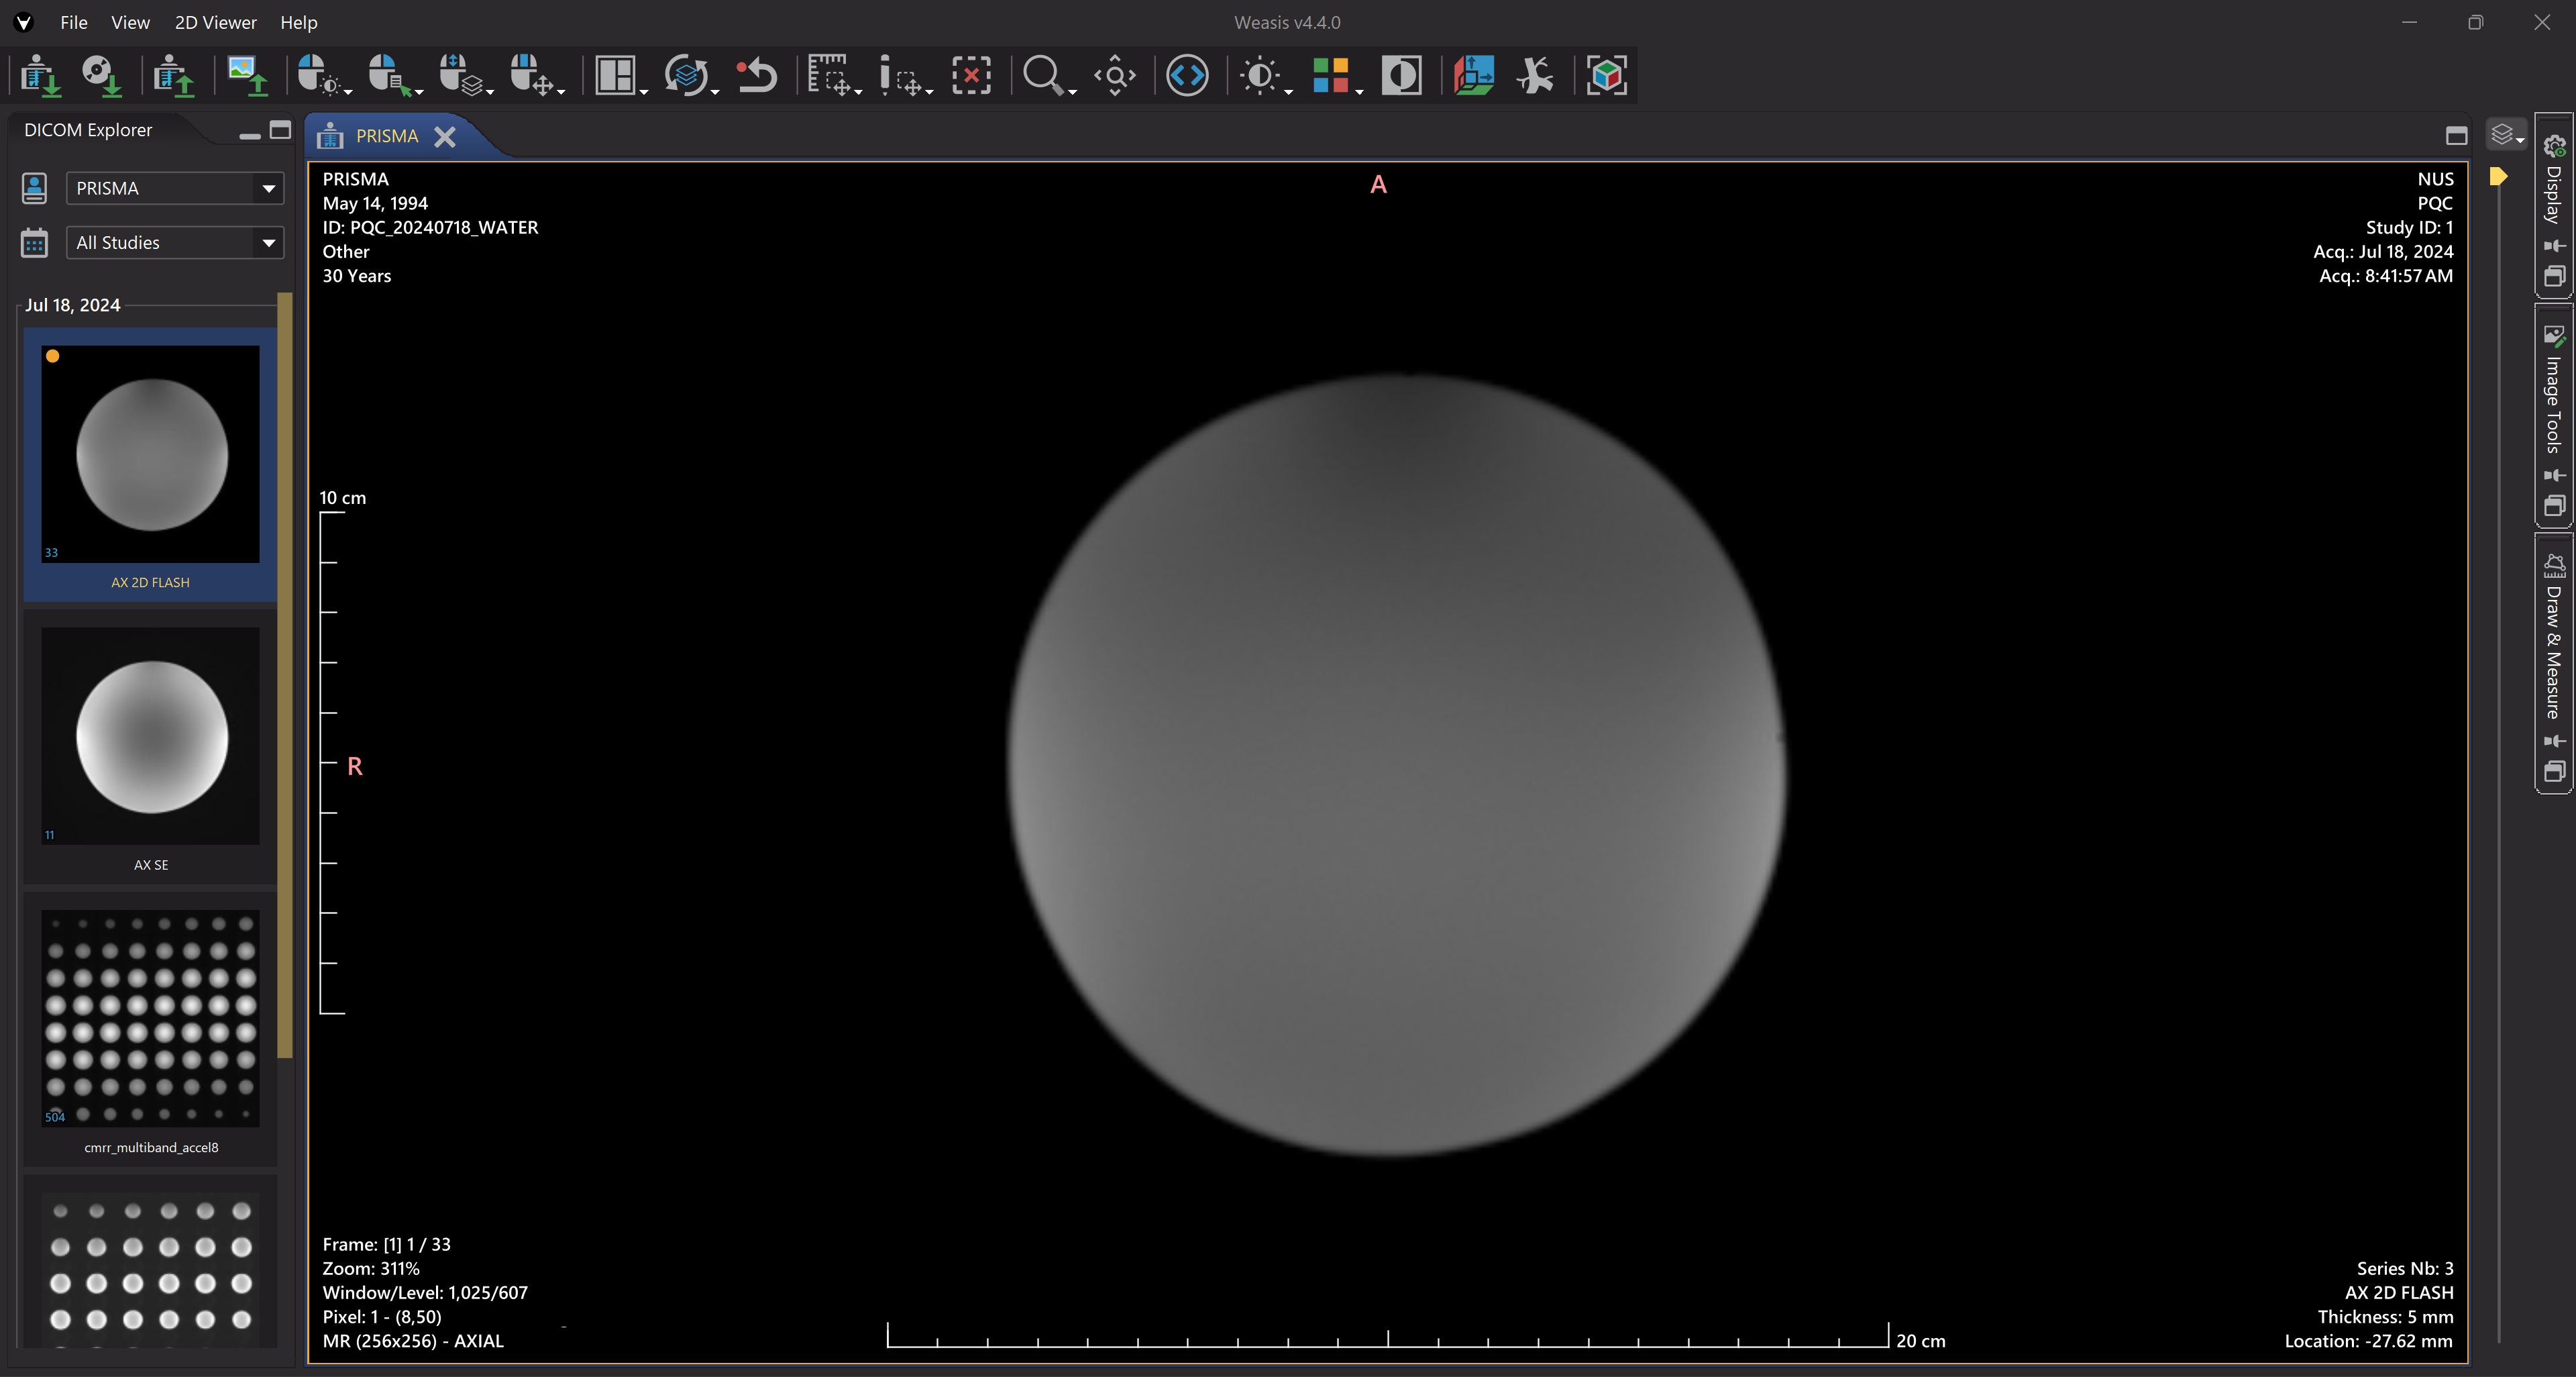
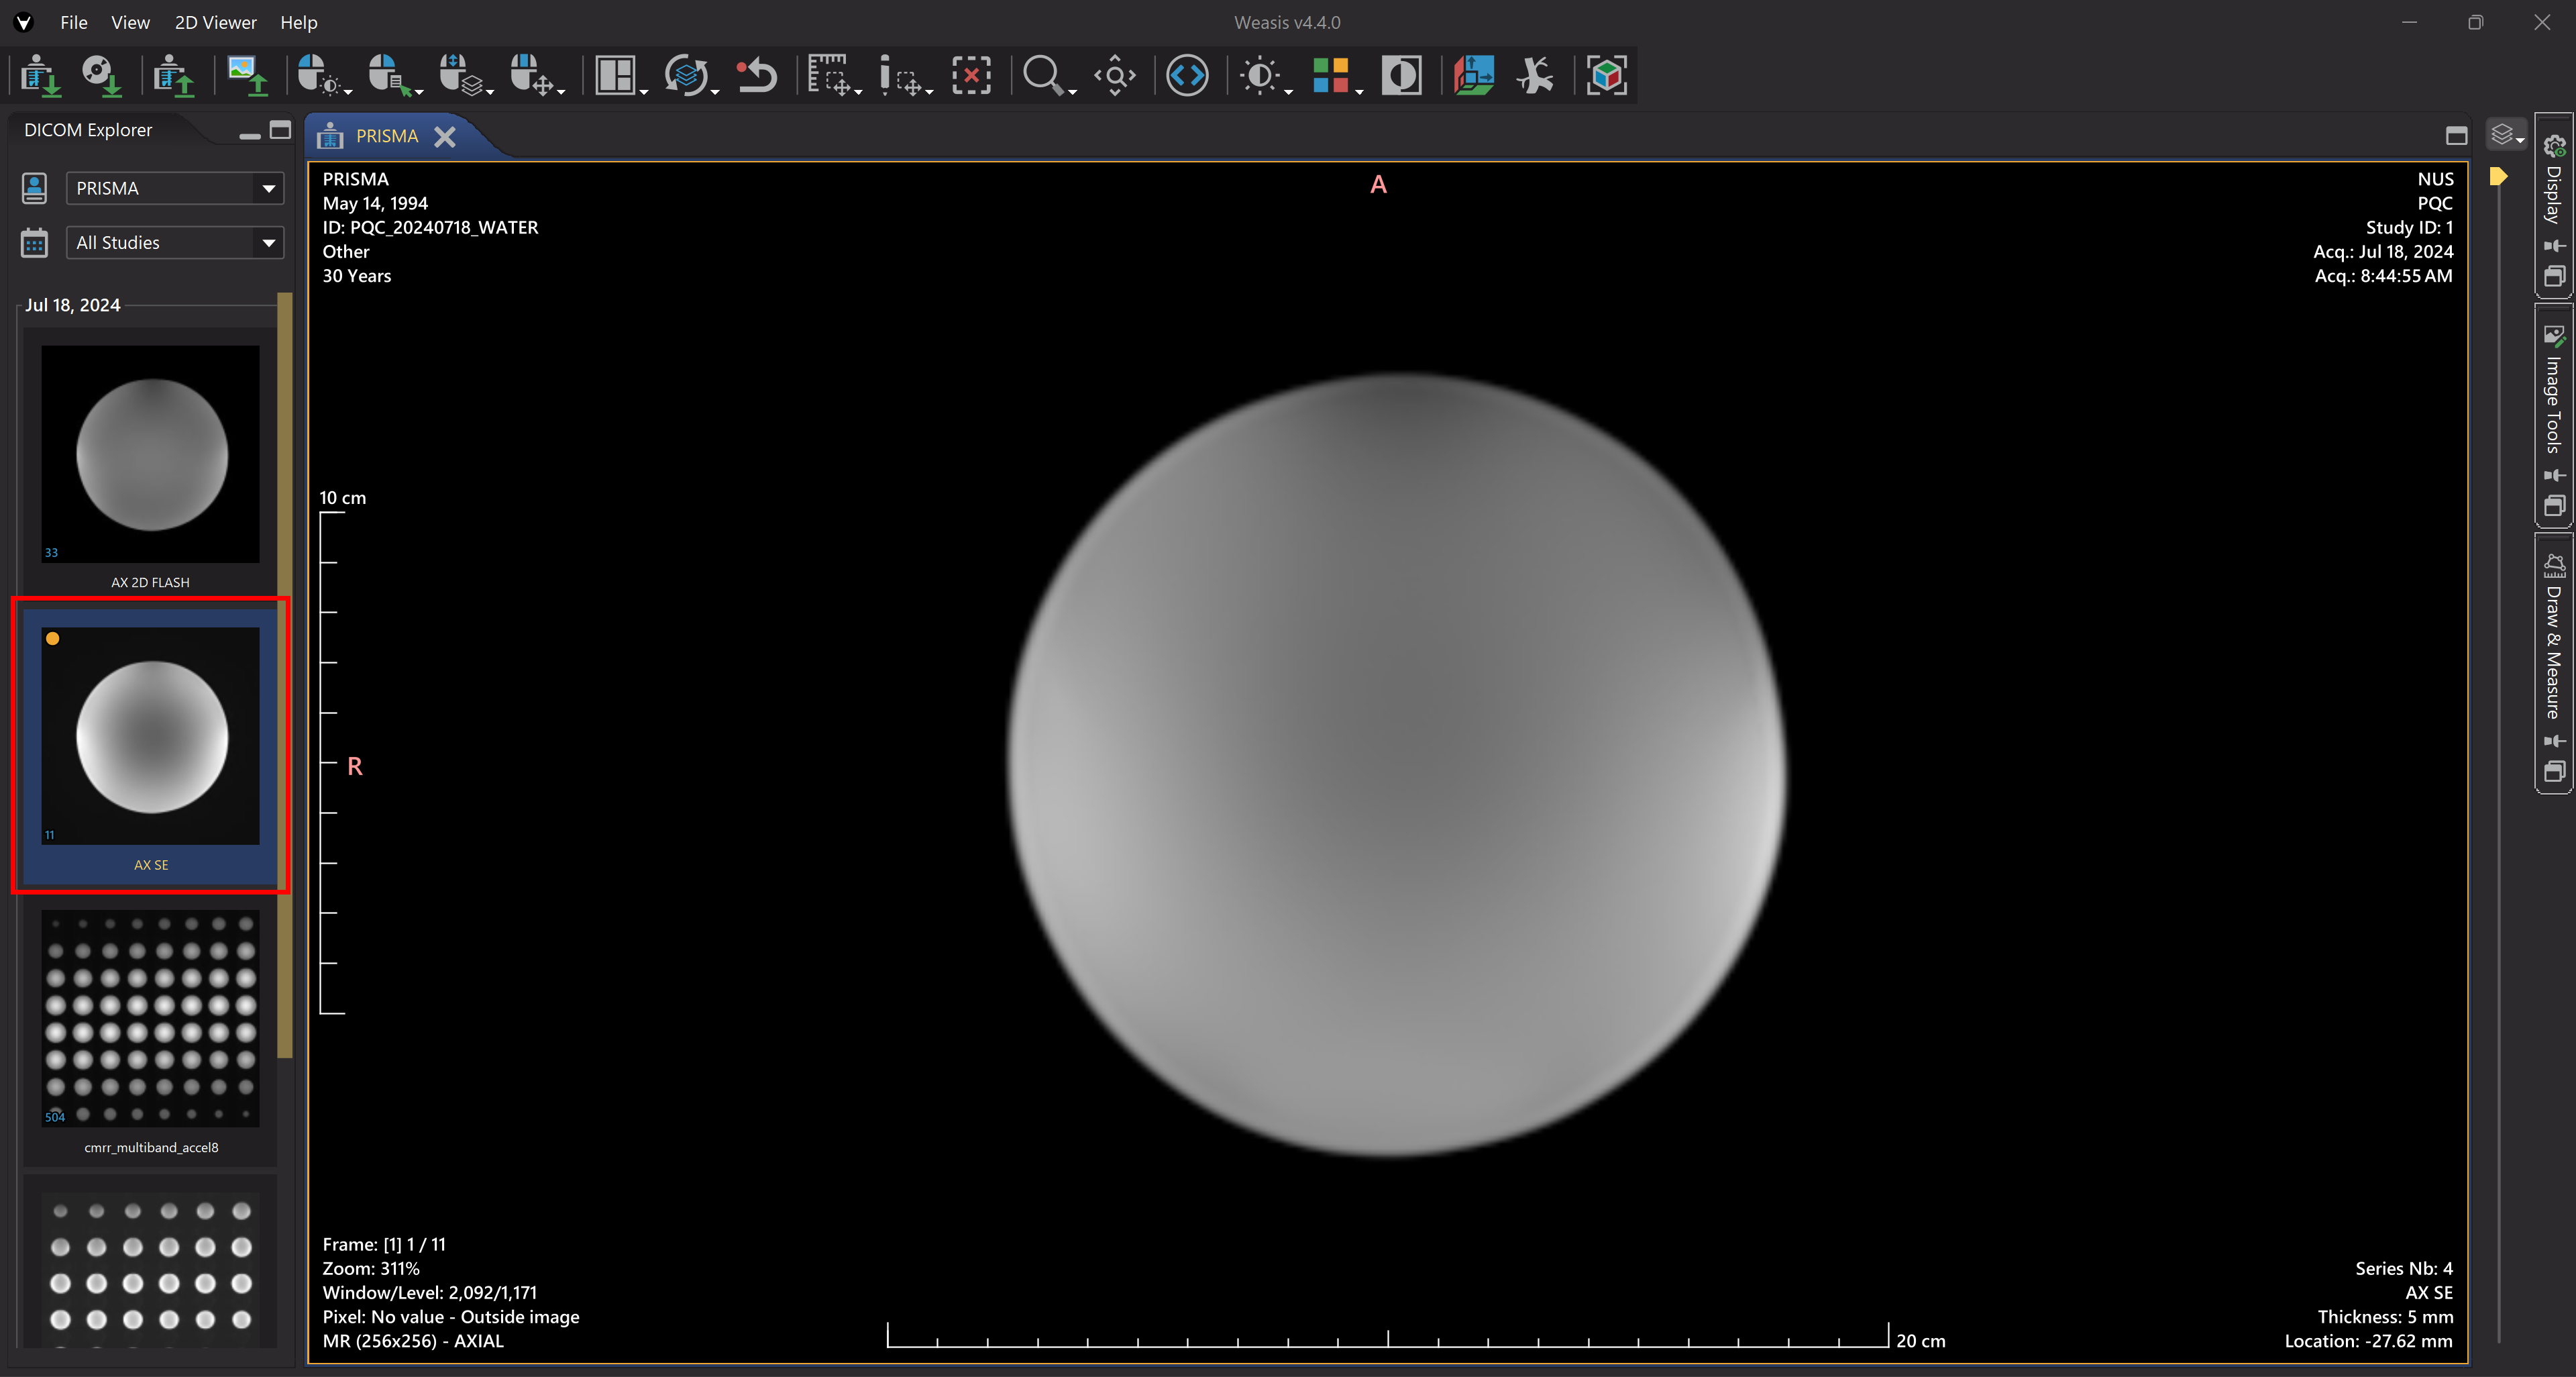
To view a different scan, simply double-click on the desired scan in the left panel (notice how the orange dot is now displayed at the top-left corner of the second scan).
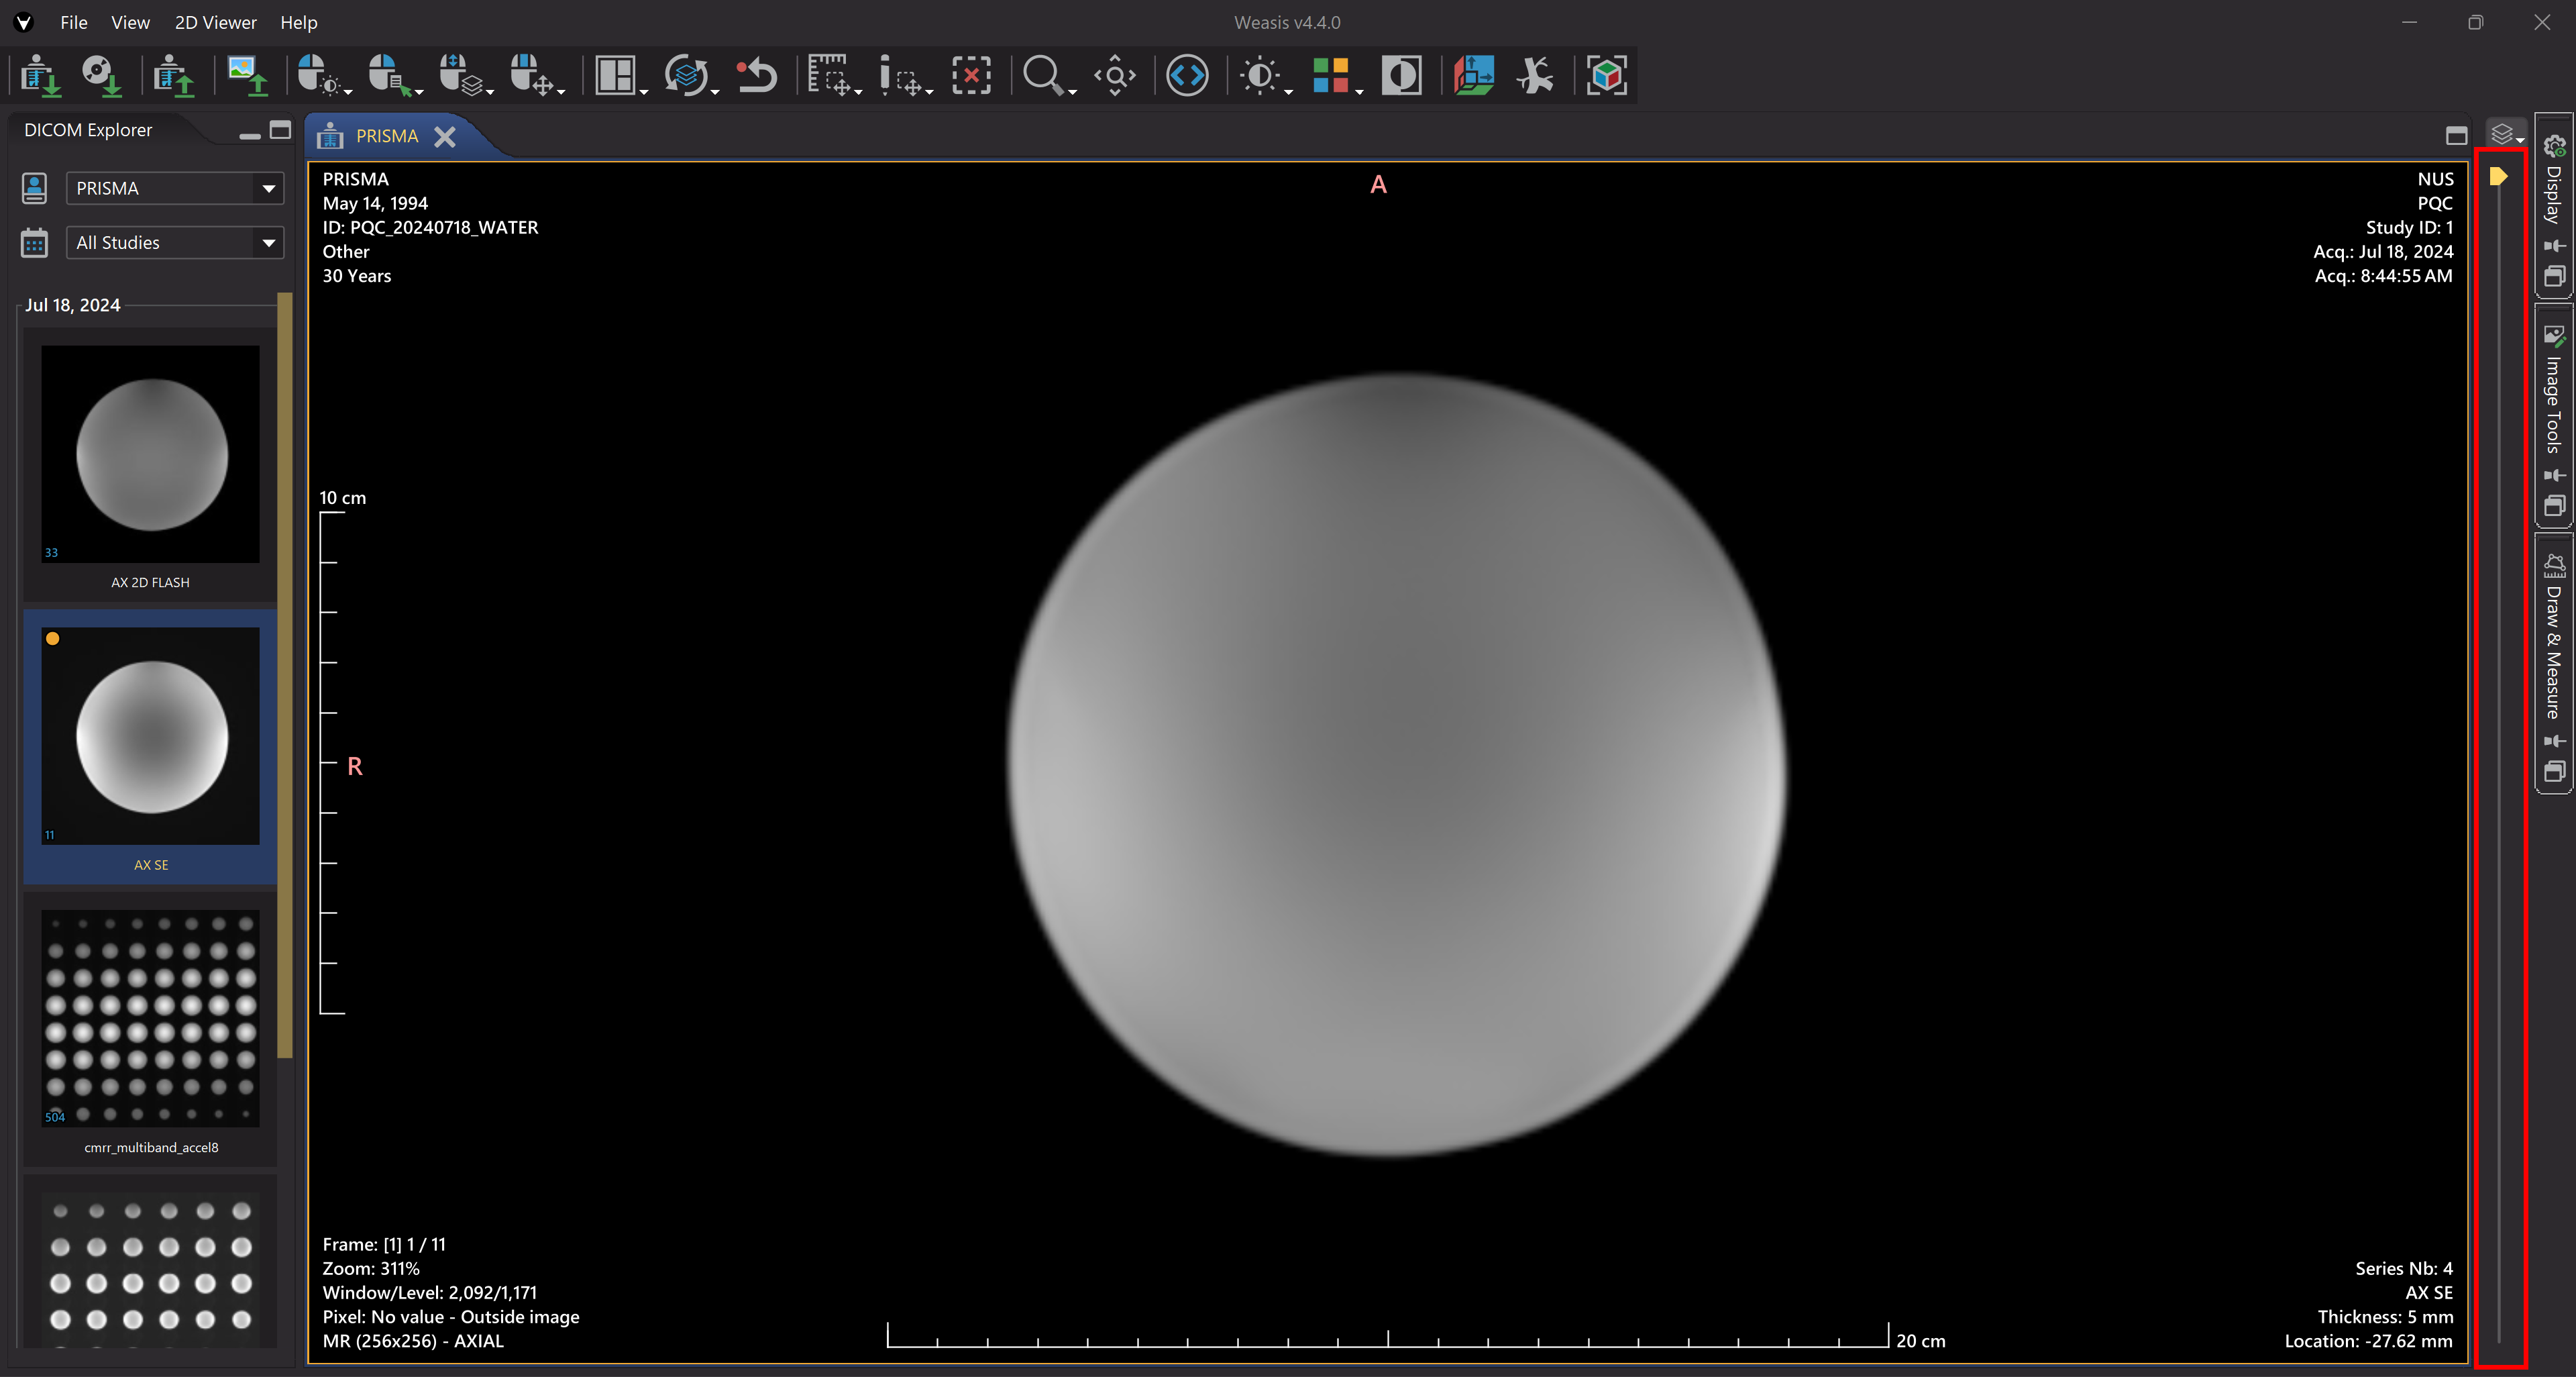
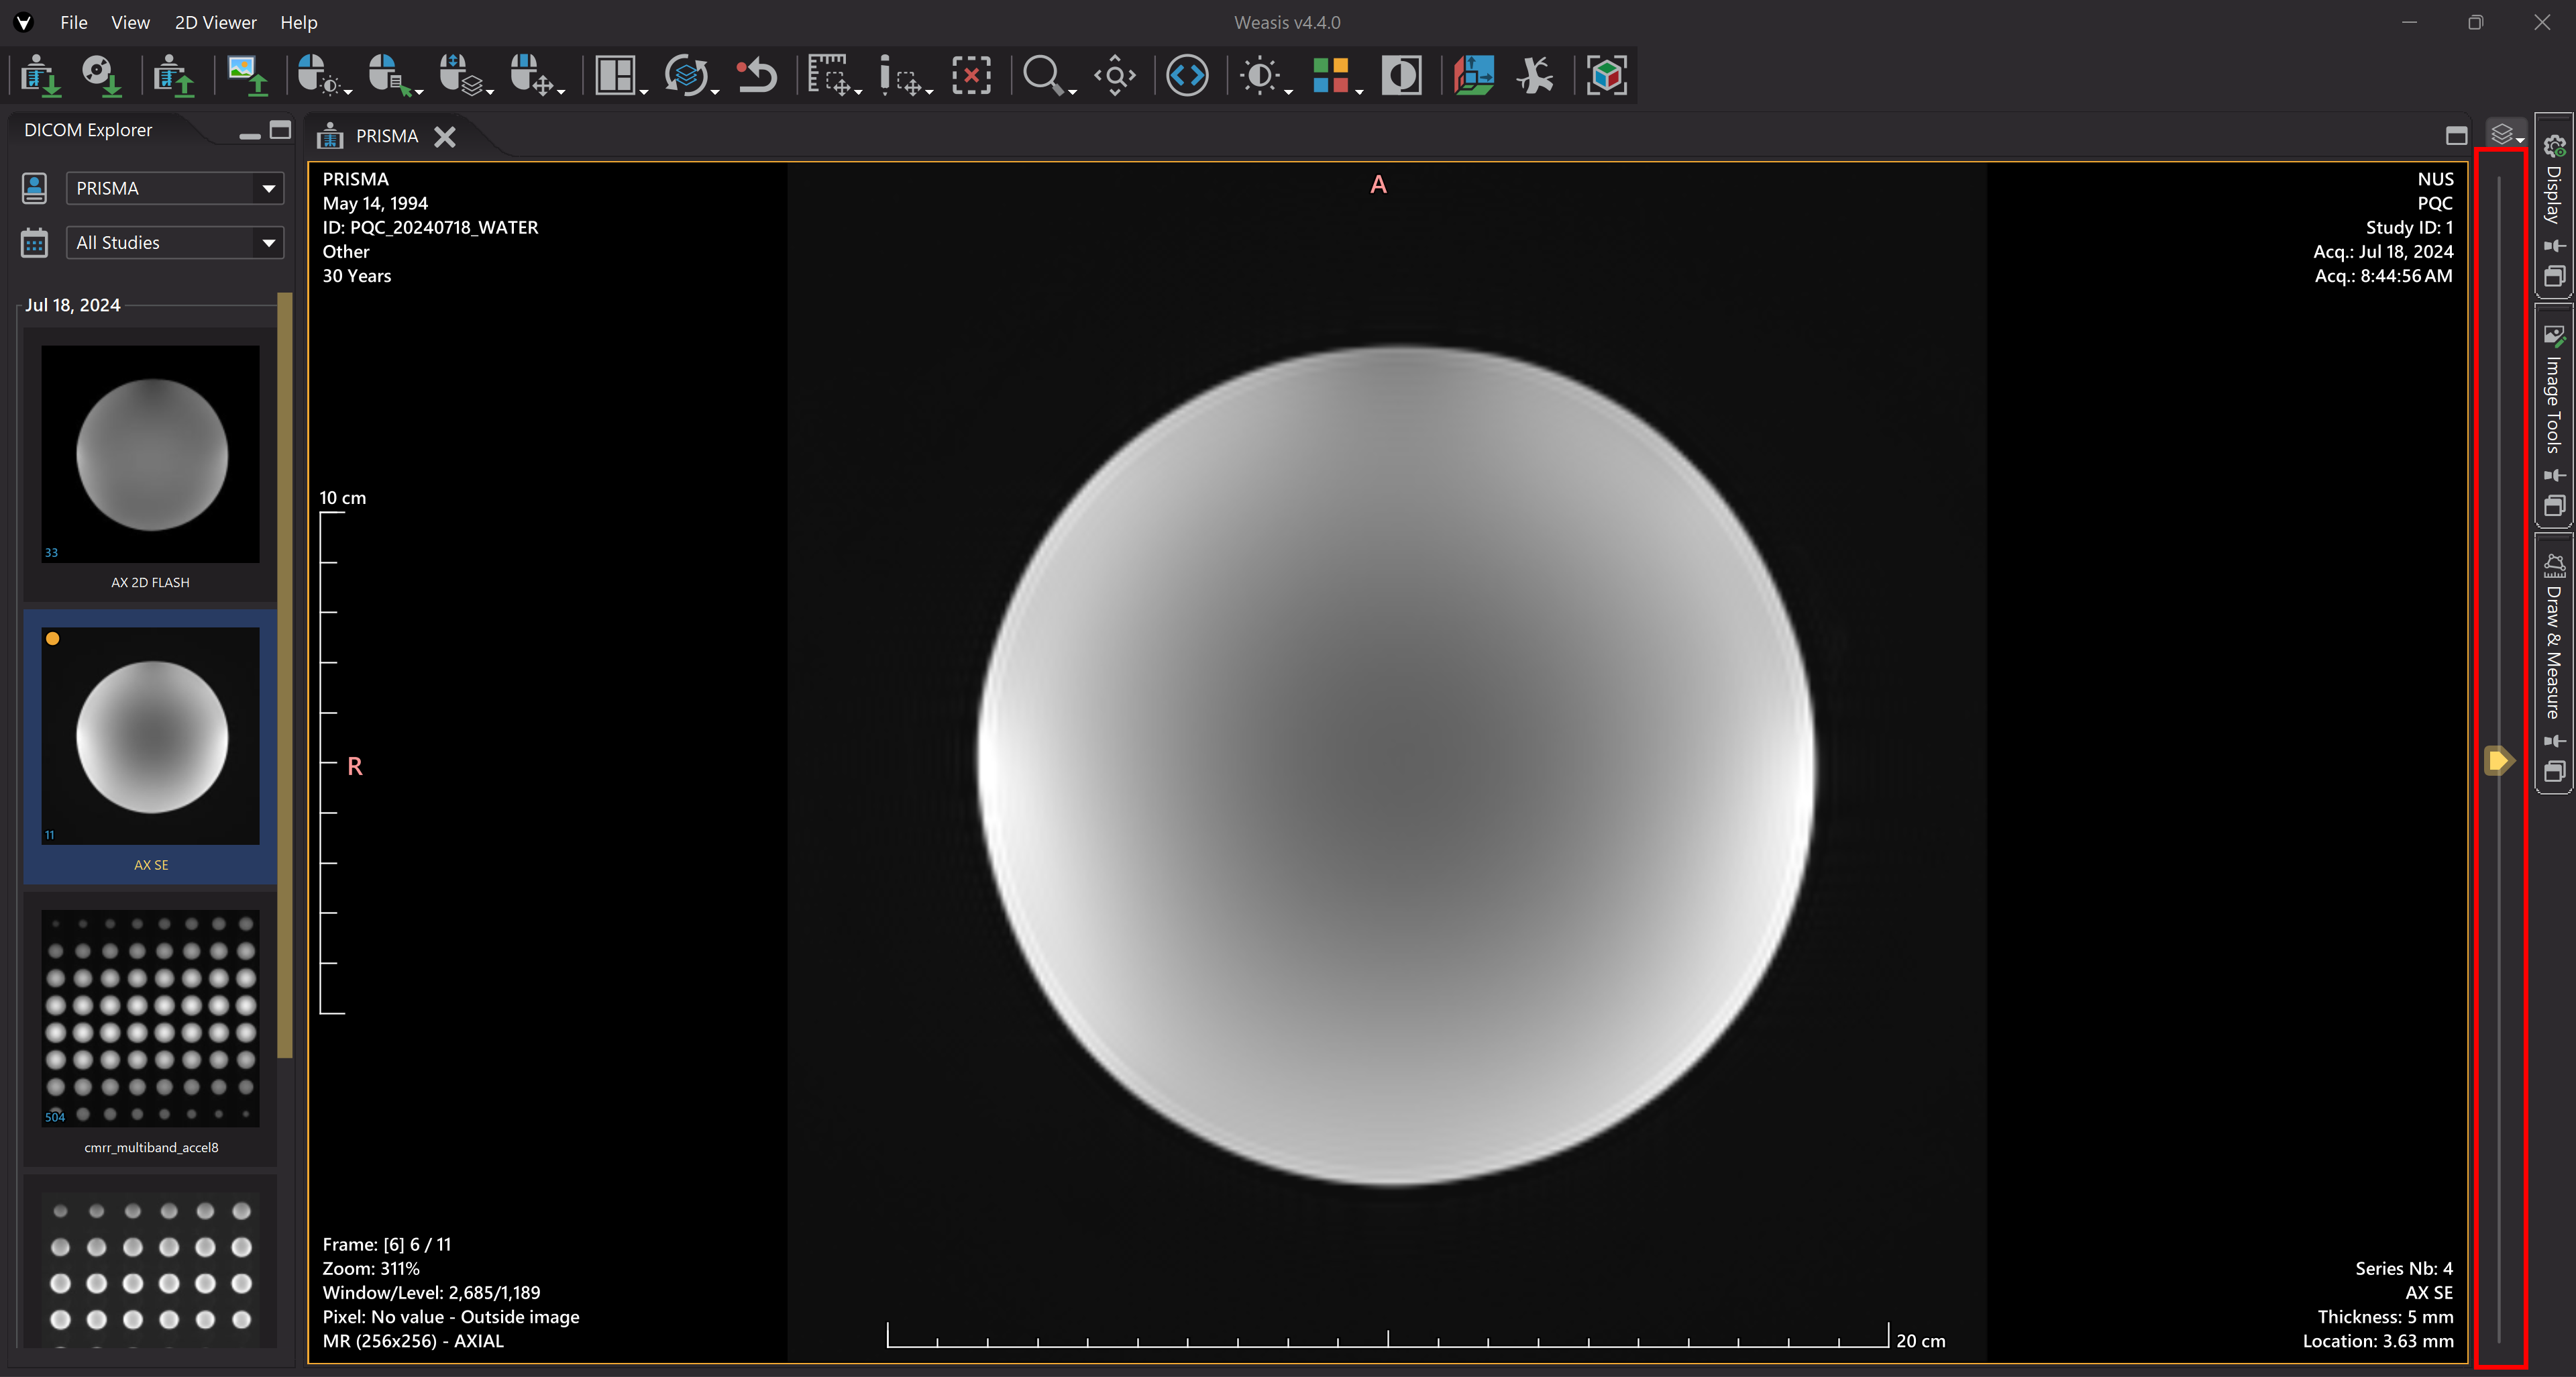
To navigate through the image series within a scan, you can use the slider on the right side of the main viewer, or simply hover your cursor over the viewer and scroll the mouse wheel.
For more advanced features and detailed documentation, please visit the Weasis website at weasis.org/en/tutorials/.
How to export DICOM images as CD/DVD images in the Weasis DICOM viewer
Before starting this guide, please make sure that the Weasis DICOM viewer is installed on your machine. If not, please visit weasis.org/en/getting-started/download-dicom-viewer/ and install the software.
To begin with, please download the subject’s scans from the XNAT website as a DICOM zip file.
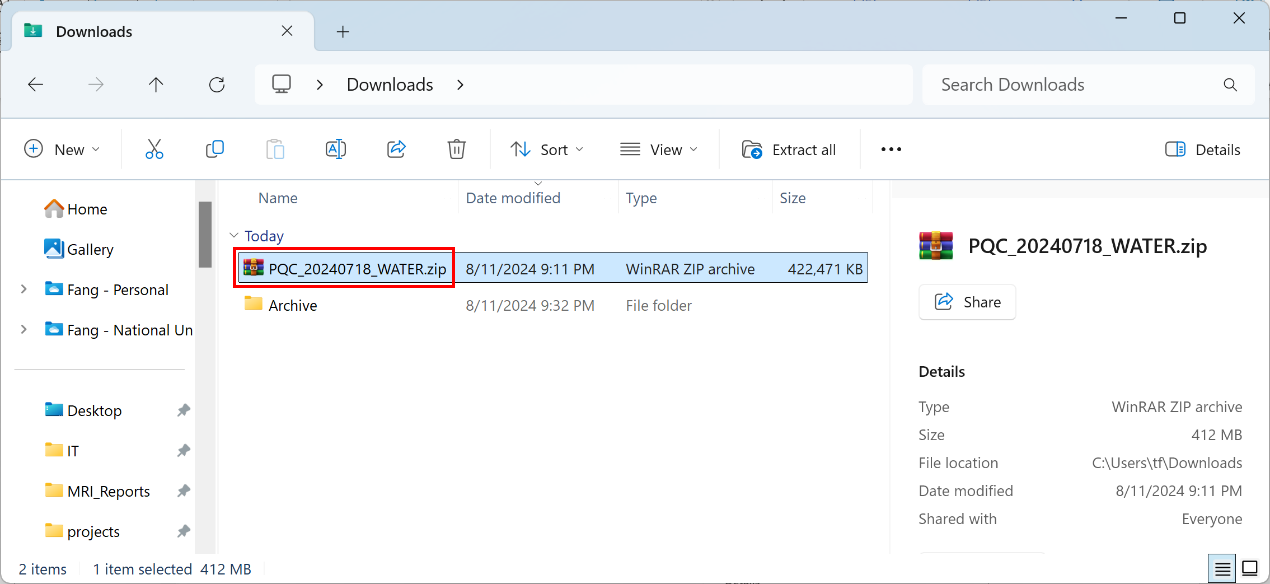
Once the DICOM image is downloaded, it can be opened with the Weasis DICOM viewer via the following steps:
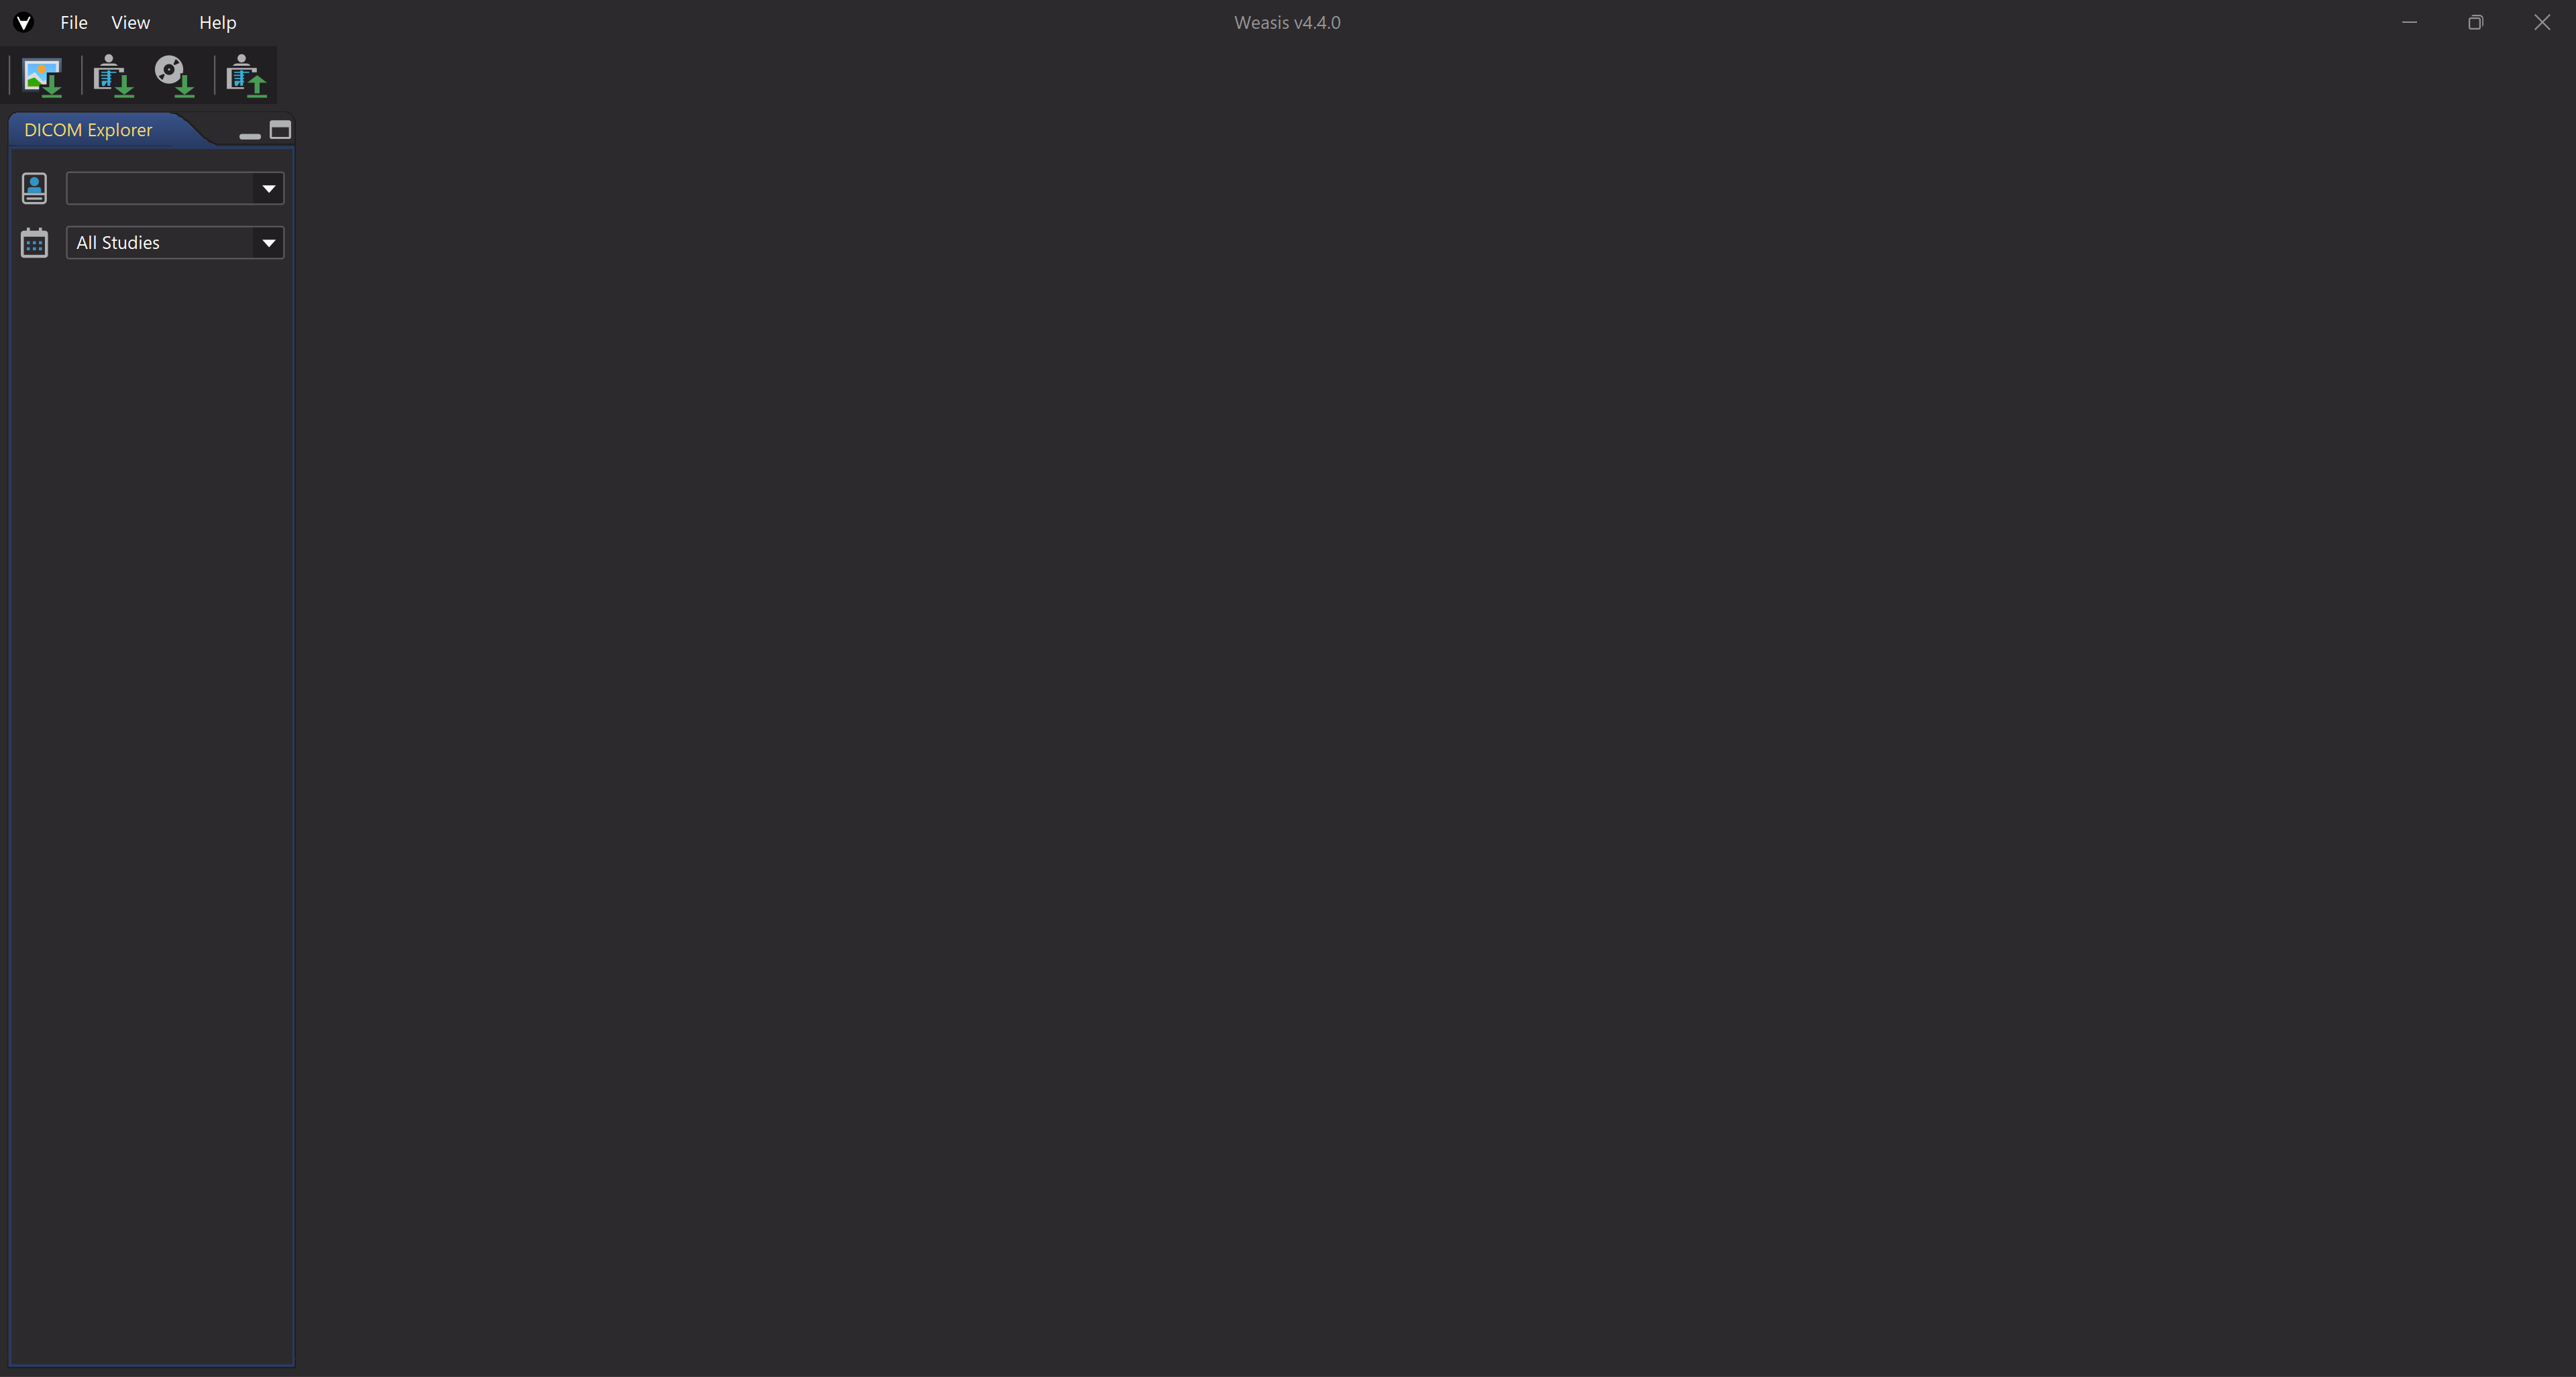
1. Firstly, open the Weasis DICOM viewer
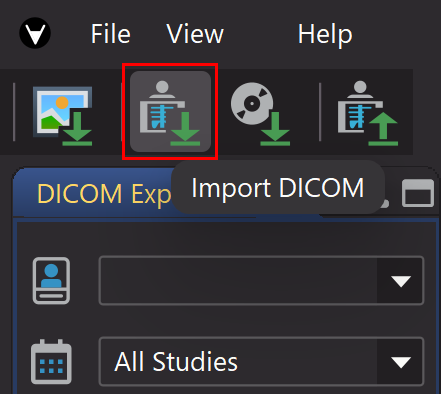
2. Then, click on the “Import DICOM” button at the top-left corner
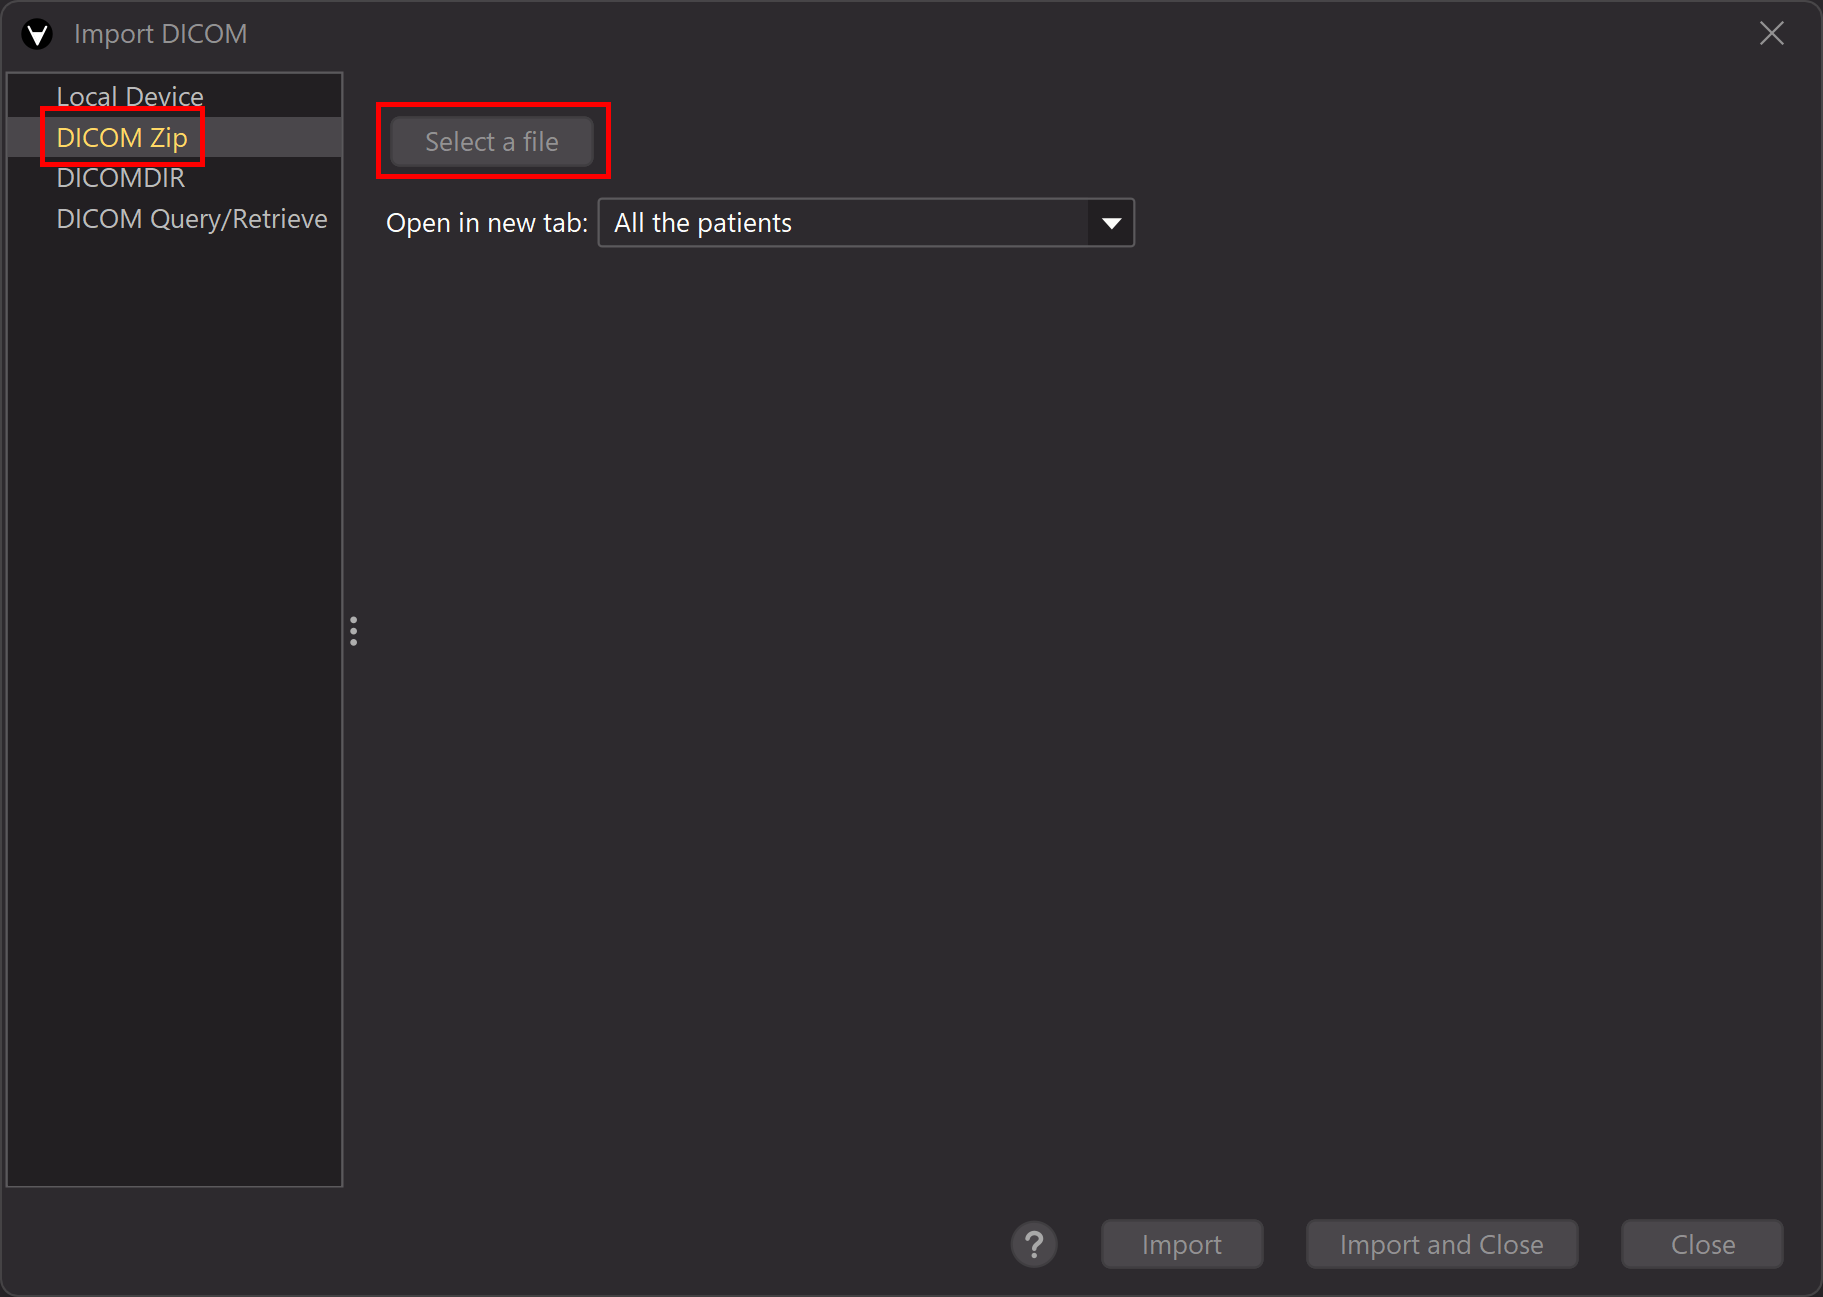
3. In the pop-up window, select the “DICOM Zip” option on the left, and then click on the “Select a file” button on the right
4. The file explorer will be opened, using which you can select and open the downloaded DICOM zip file
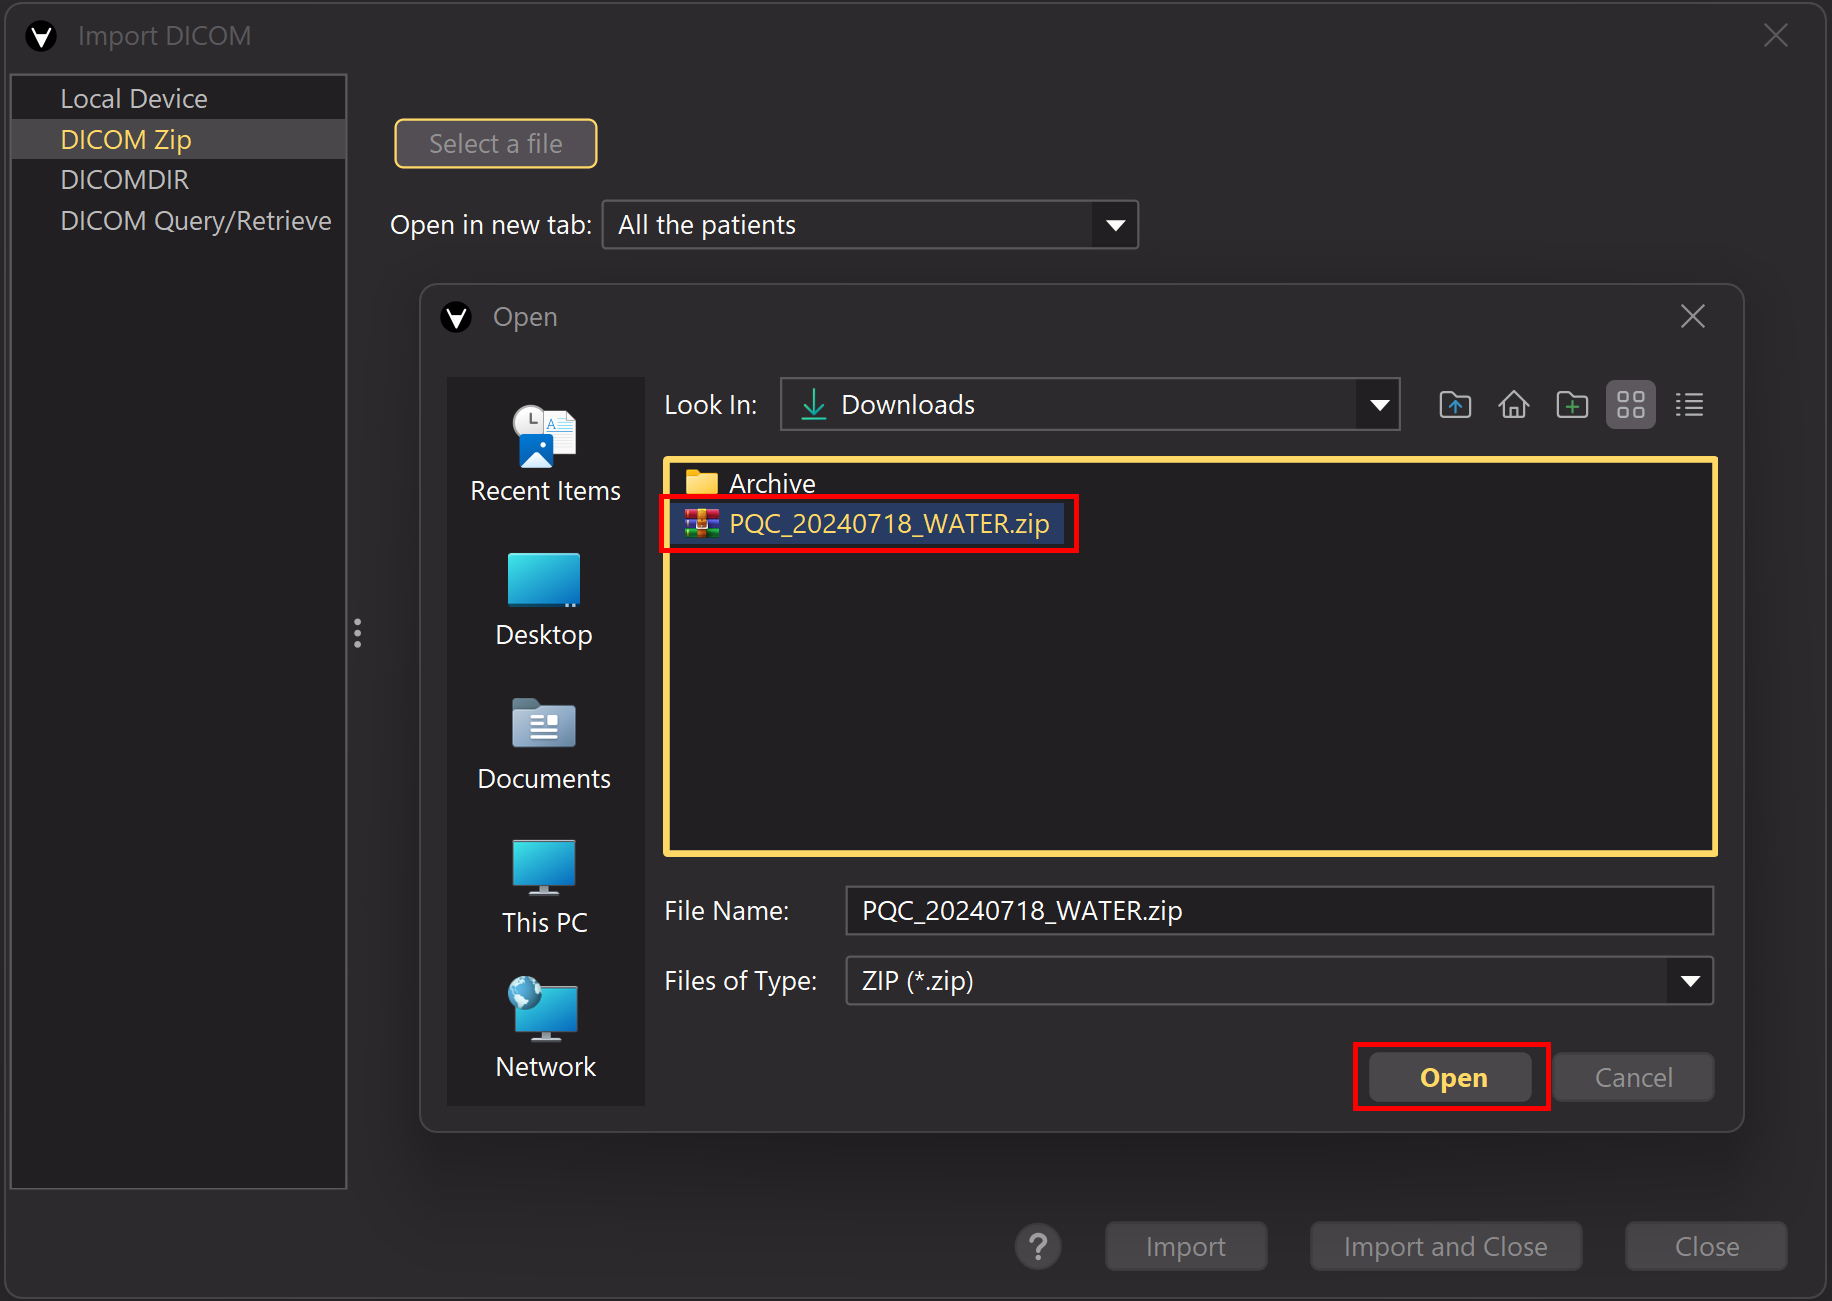
5. Then click on the “Import and Close” button
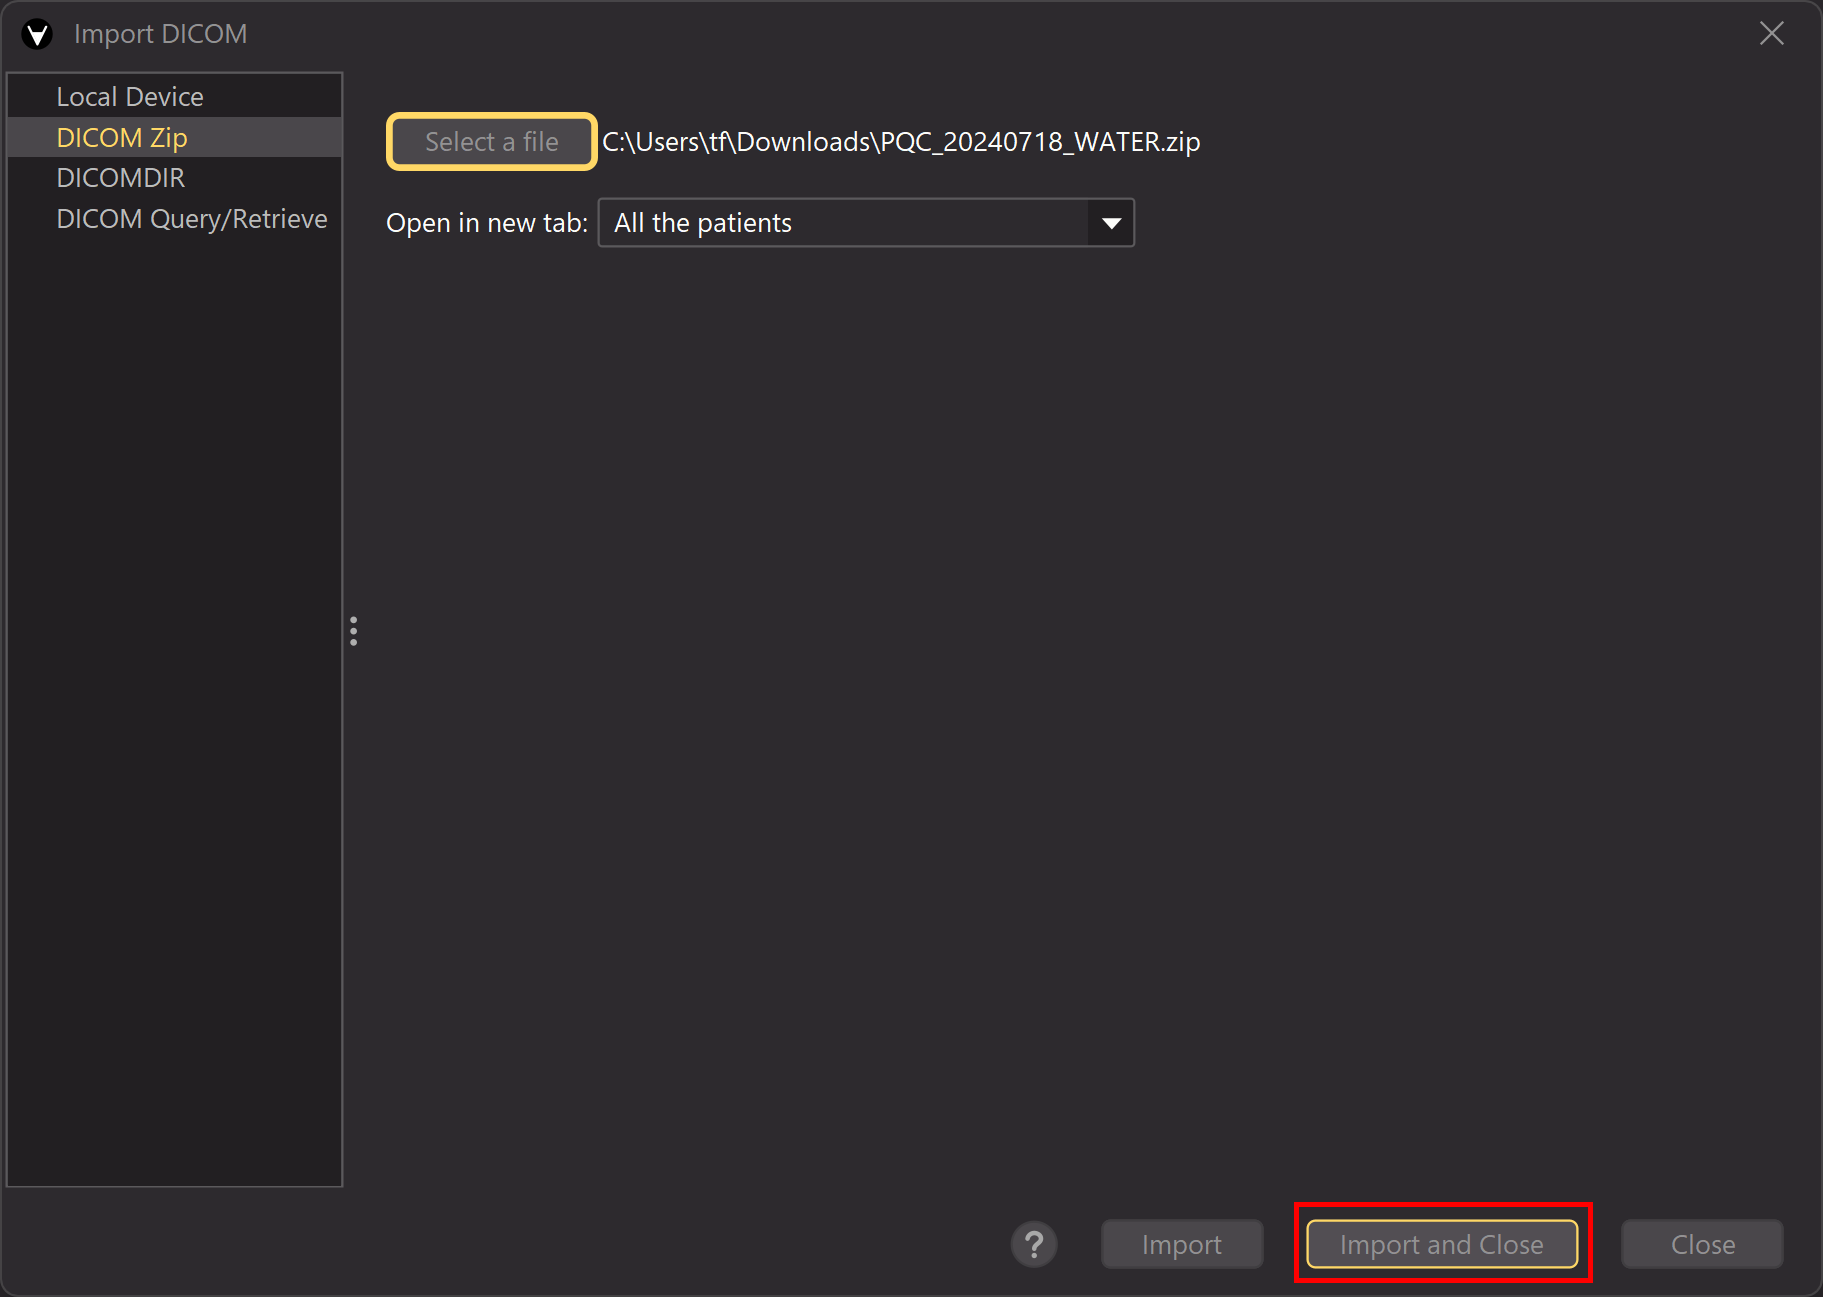
6. The DICOM zip file will be opened
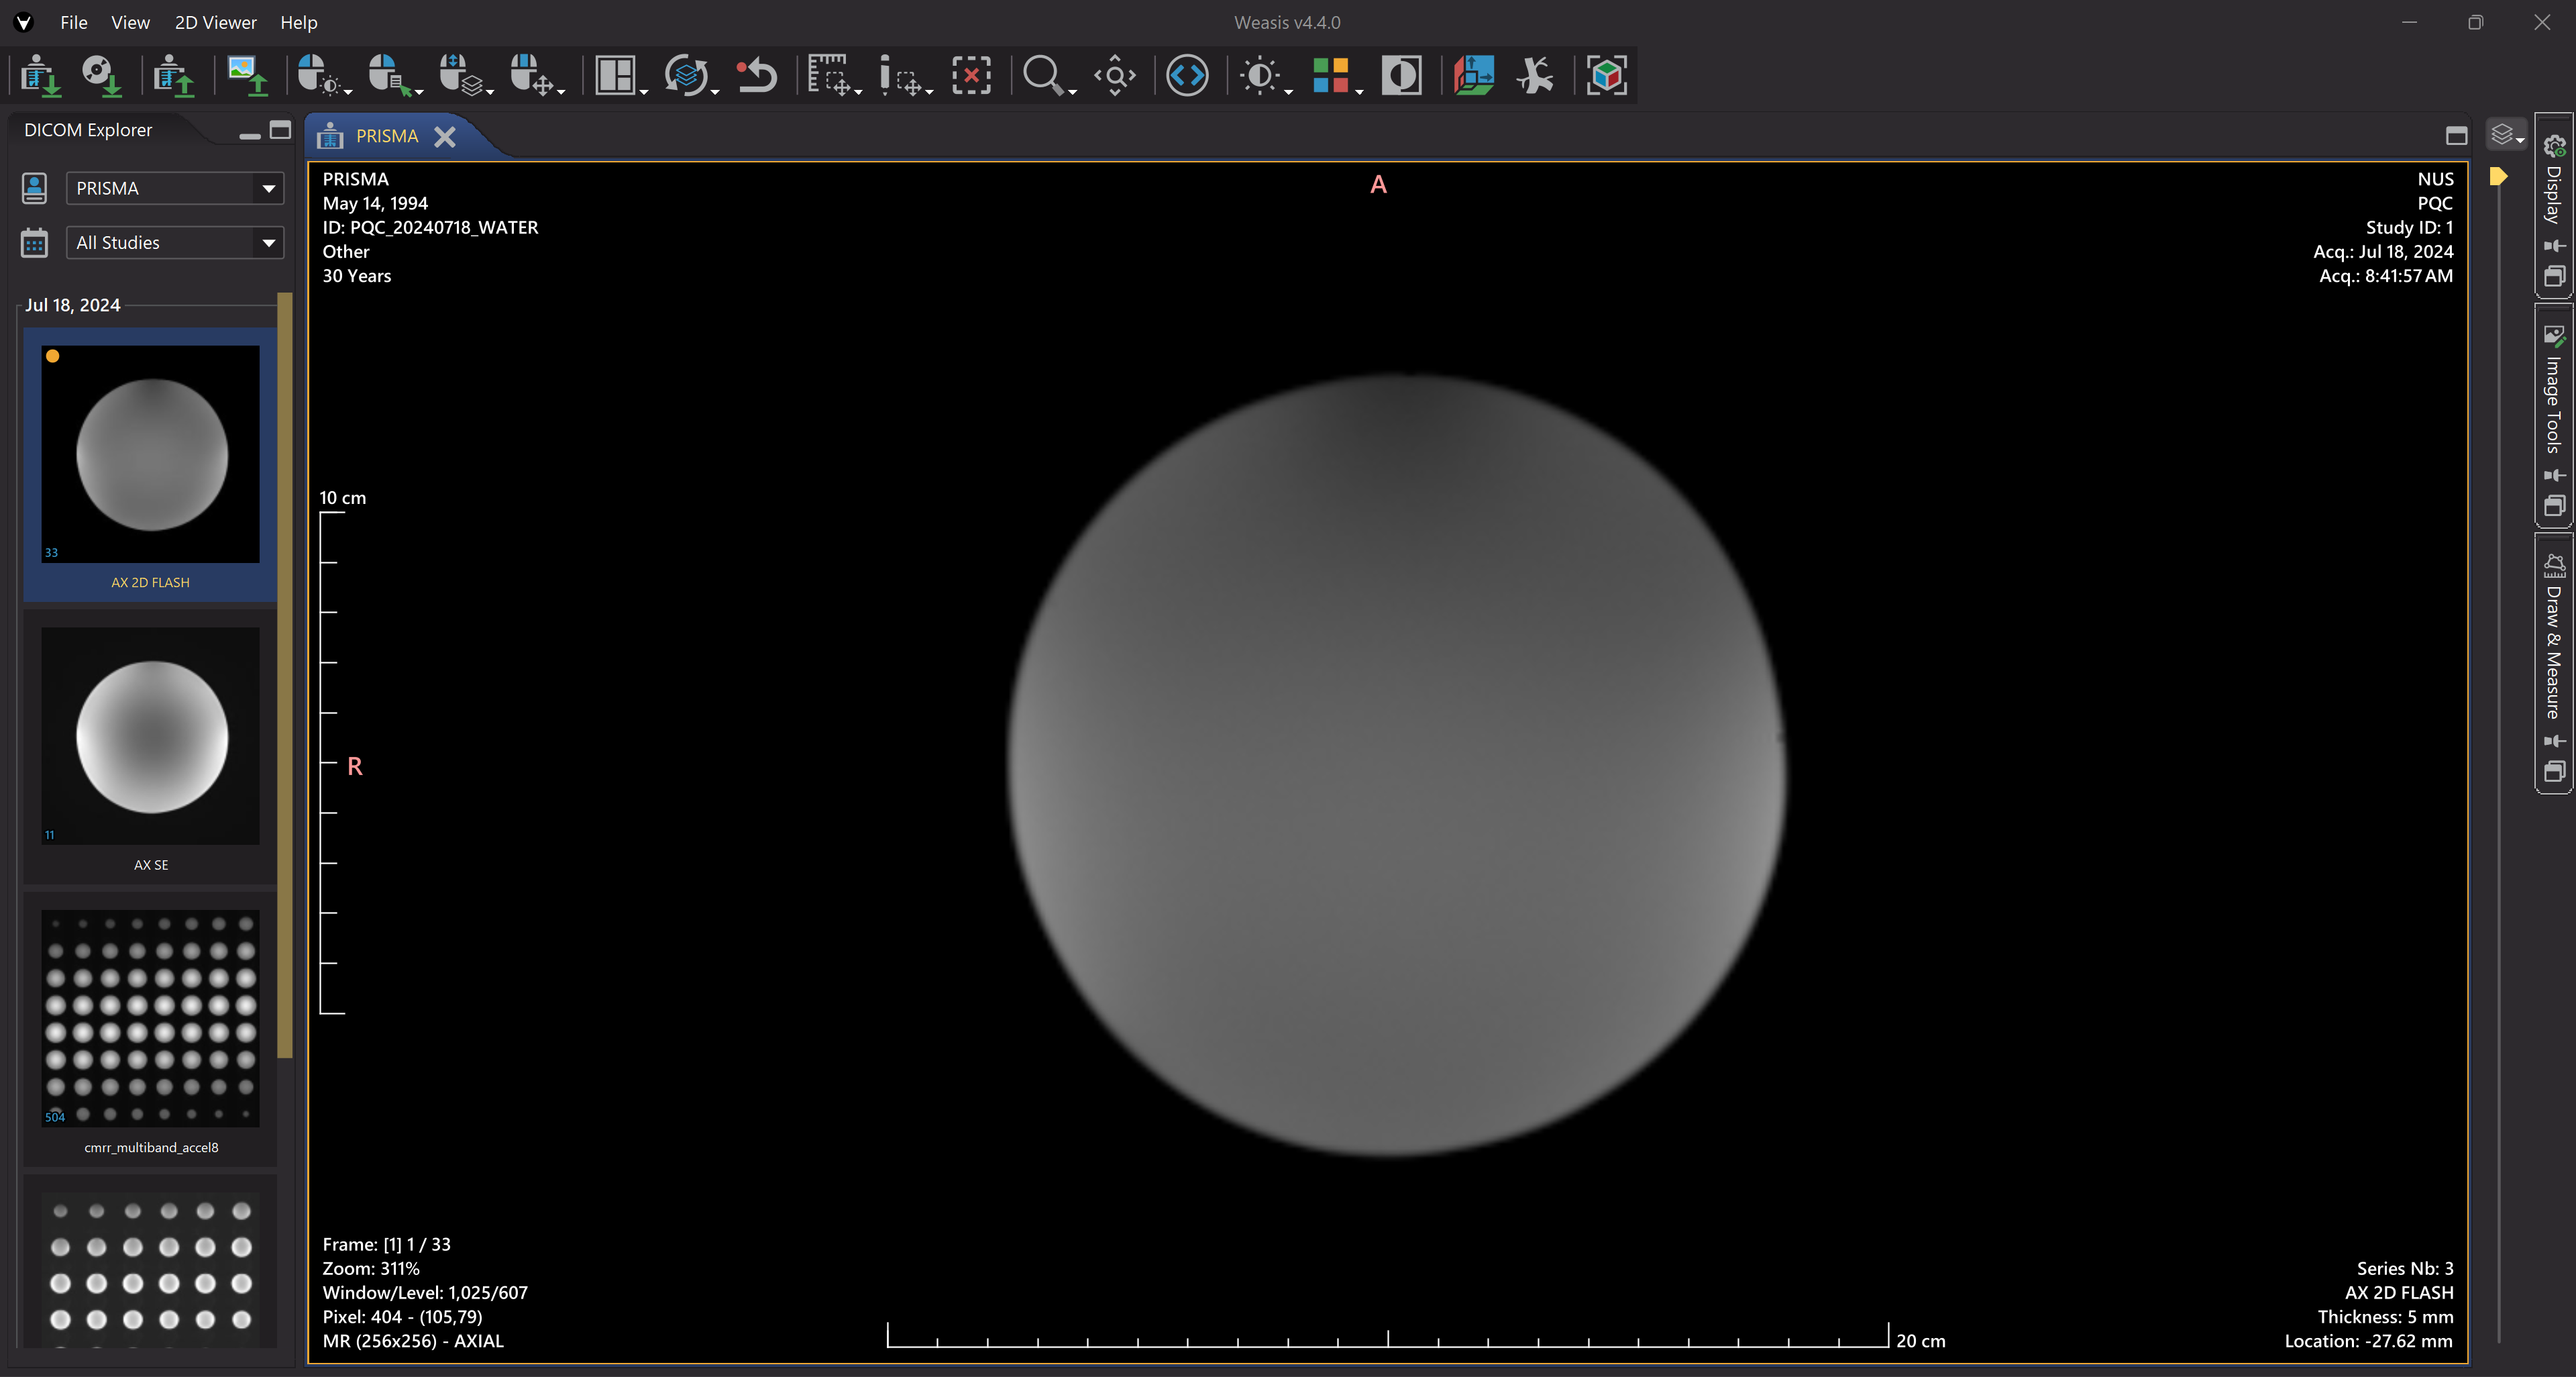
Now that the DICOM image is opened, it can be exported as a CD/DVD image containing the original DICOM files, converted jpeg images, and the Weasis DICOM viewer. This can be achieved with the steps below:
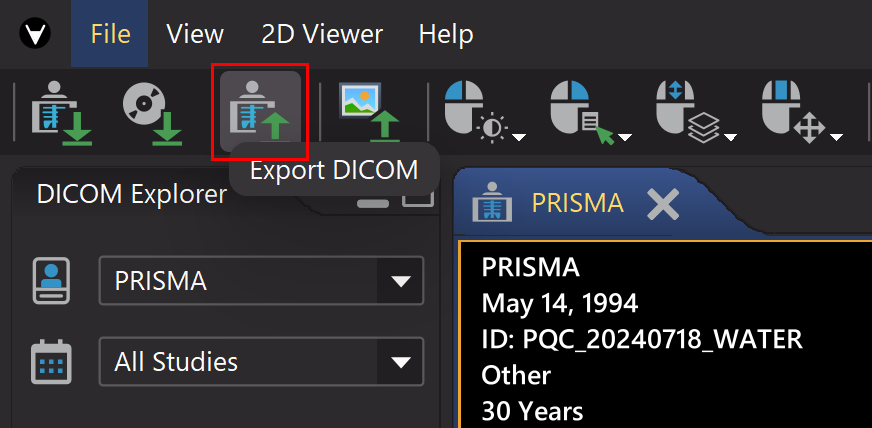
1. Firstly, click on the “Export DICOM” button at the top-left corner
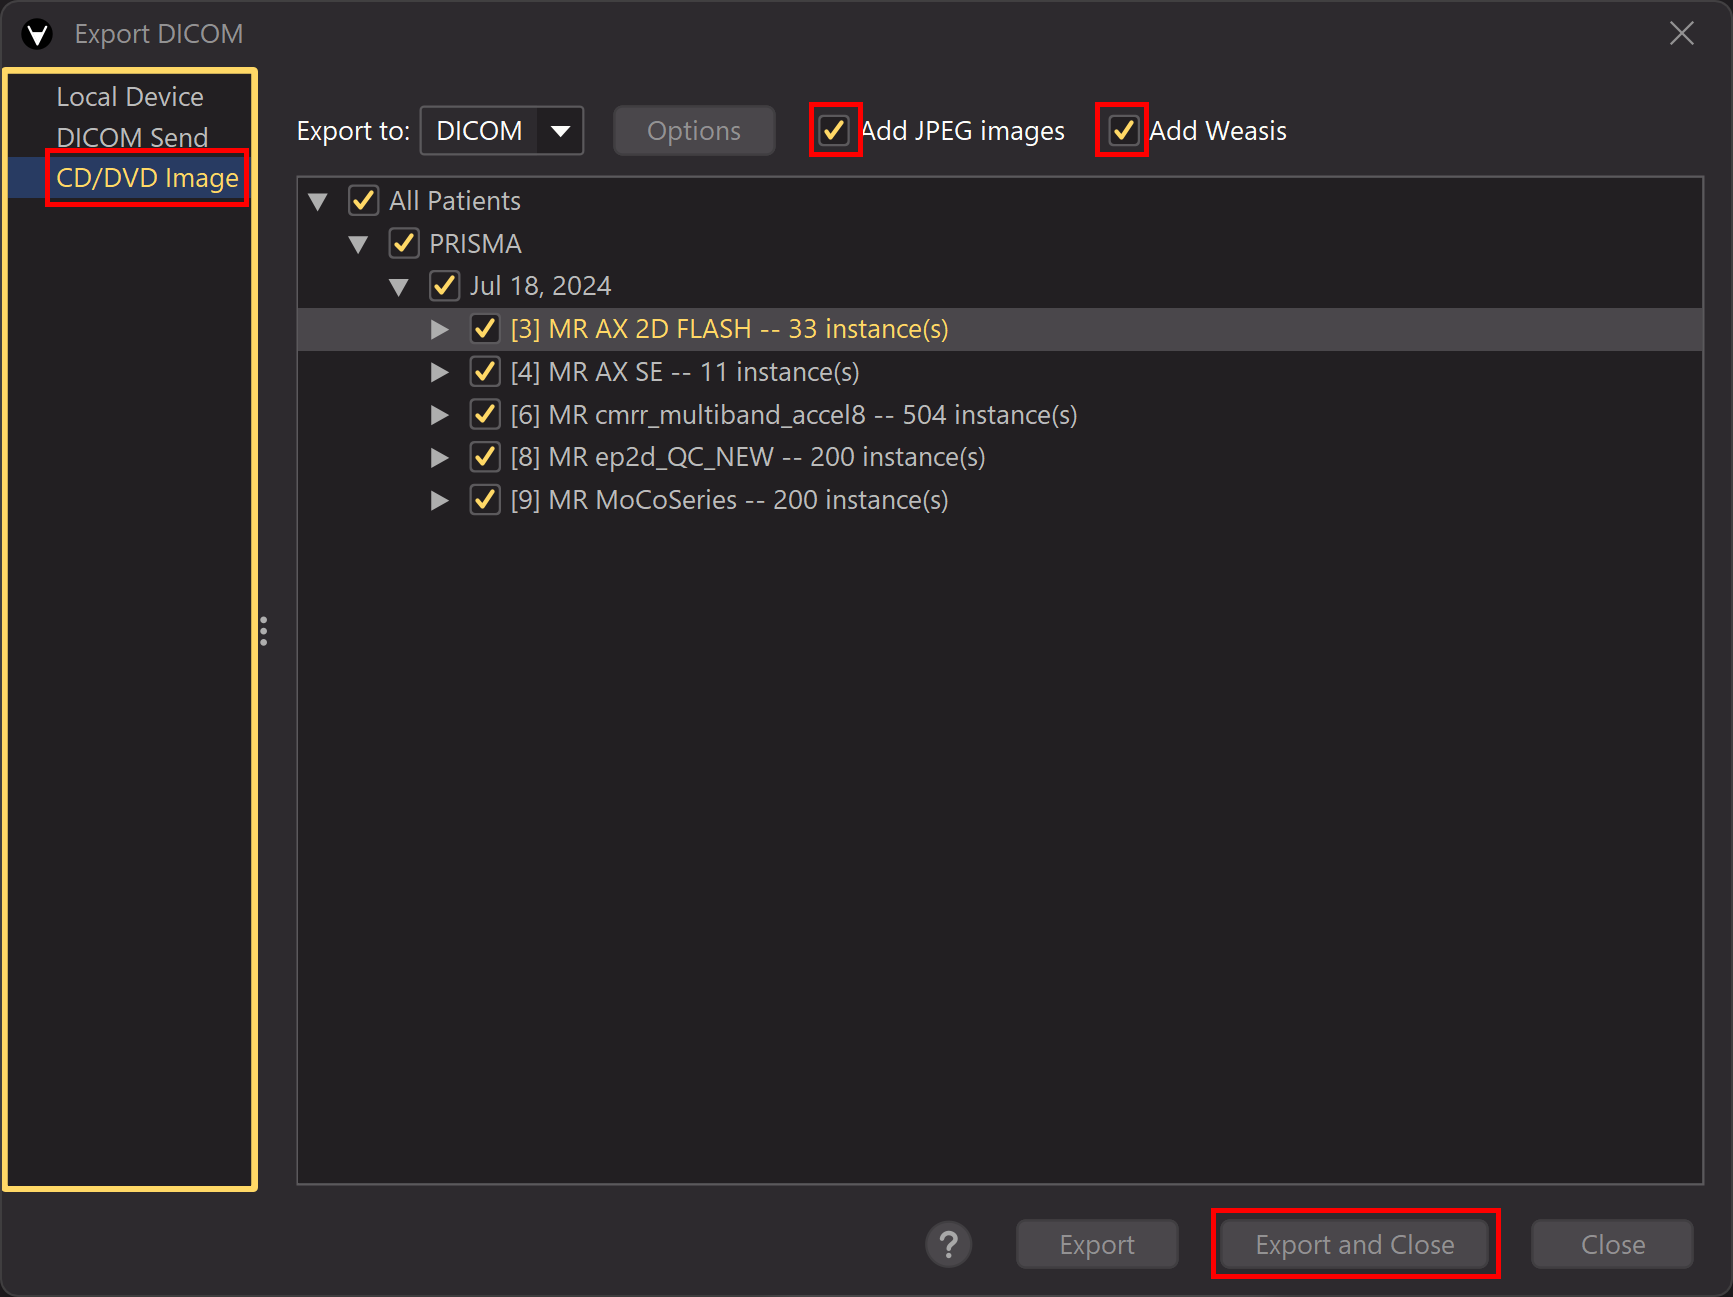
2. In the pop-up window, select the “CD/DVD Image” option on the left, check the “Add JPEG images” and “ADD Weasis” options on the right, and then click on the “Export and Close” button
3. The file explorer will be opened, using which you can define the filename of the CD/DVD image and save the image.
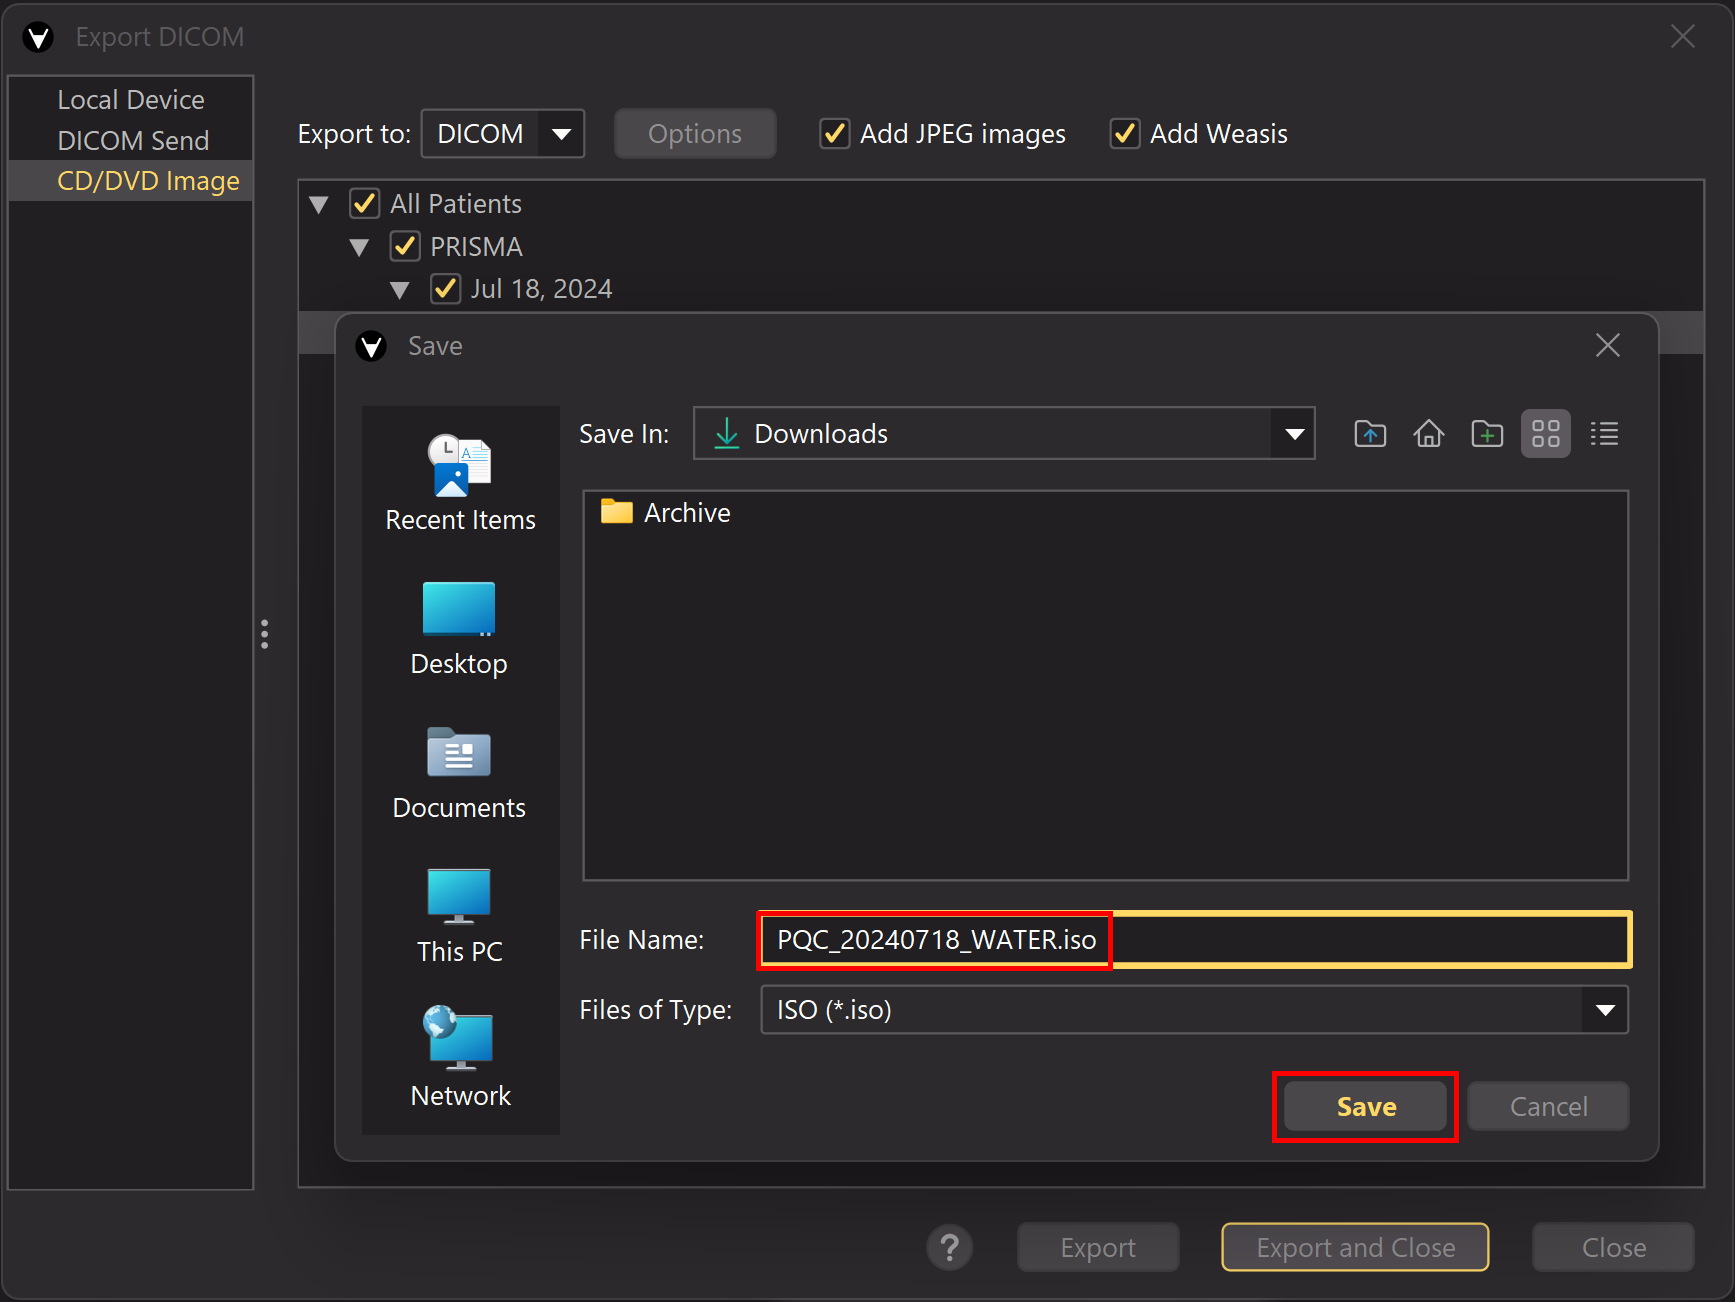
4. The exported .iso file will contain the original DICOM files, converted jpeg images, and the Weasis DICOM viewer.
